

A Pastel Christmas Album
.JPG)
I've had some fun creating the covers for this year's December Daily and wanted to share with you my process.
Although I am going with pastels this year, I'd love to see them done using the traditional Christmas colours. I must apologize for some of my photos here. The lighting wasn't playing nicely in my scrap room (but then again it could very well be the photographer lol)
Firstly, I've cut 2 pieces of board approx. 8"x 6" (this size is bigger than my first Dec Daily and a bit smaller than last year's) and punched a couple of holes for the rings. Then I've completely covered one side of the boards with glue and used scrumpled tissue paper to cover them and trimmed up the edges when it had dried.


I added bits of plasterer's tape (I think that's what it's called) and some masking tape for a bit more texture on both the front and back covers.


On the front went my December 2013 title and some buttons. (I knew I wanted to add a chippie Santa that I've had for ages, across the top, so popped him there temporarily to see where everything would fit before sticking down my title).

When it was all nice and dry I gesso-ed over it all going over the edges as well and onto the inside covers.


I had to re-punch the ring holes and then I started dry brushing some colour onto the tissue paper. (When I dry brush, I load the tip of the brush with paint and then wipe most of it off on paper towel and brush over the top of the raised bits of the crumpled paper). There is blue, a little bit of green and a very small amount of pink on there but it's not showing up too well in my photos. I've brushed over the word December heavier in the blue, the 2013 with a blush colour and dry brushed over the buttons with the blue, green and pink paints.


My Santa was then glued in the spot I had reserved for him. I've had this Santa sleigh for awhile and had previously painted it cream. So I gave it a mist with some brown to see if that would suit but wasn't happy with how he looked against the background that I had done, so I dry brushed some of the green paint I had left over from the cover onto it and liked it better.


I trimmed off one side of the Santa evenly with the edge of the cover and left the other overhanging. Getting away from the pastels a bit I wanted to vintage it up a little so added some brown mist drips which soaked into some of the folds from the crumpled tissue paper.

I've then finished it off by highlighting the sleigh and the 2013 with dimensional magic, scattered on some pastel coloured sequins, gave the reindeers a little twine bow and added a little banner under the 2013.


And inside my covers.......
I have simple cut some patterned paper slightly smaller than the cover size, sanded the edges, then crumpled it up, straightened it out and sanded over the crumples, then glued to the inside of both the front and back covers and re-punched the holes again.

So now my covers are done and I'm looking forward to creating my pages come Dec 1. I've been putting together a few bits and pieces to have on hand. I think I'll be using paints quite a bit and I'll be using some older Christmas stamps that I have and getting some use out of them and making some of my own embellies too ..... well that's the plan anyways. Going pastels for Christmas could be a bit of a challenge for me so if I feel the need to throw something else into the mix at some stage to make me happy with it, then I probably will.
DEC 1.....
Like a lot of people I put my tree up on Dec 1 so that was to be my page for that day. We also have a little "real" tree in a pot outside so I wanted to create a scene type page to show both trees.

DEC 2....... We have a set of wooden cats in the entrance and each Christmas they get "decorated" by one of the grandchildren. This year the littlest one decided they needed to wear the Santa hats that I put out for some photo taking. The cats have been given the title of the Woody family - Dad, Mum and baby Woody. For the background I've simply sanded back some embossed cardstock.


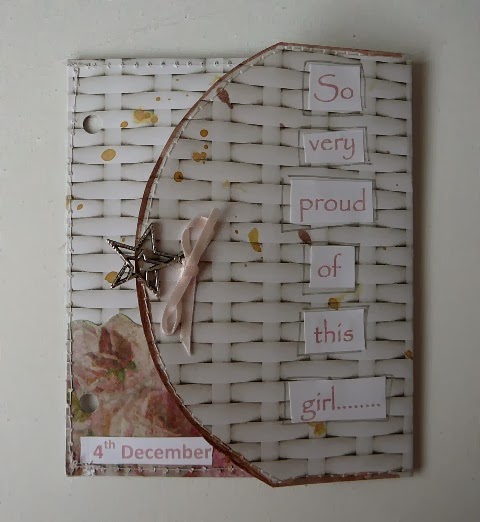
and DEC 4.........All the catalogues that we are being inundated with at this time of year. I must admit I do enjoy them.


DEC 6........... A stroll around the garden to take a photo of some pretty pastels in bloom. Last year I took some photos of some pretty reds when I went for my walk and I loved that page. When I put them on the background the photos looked a little bright for the look I was wanting so I went over them in some picket fence Distress Stain to tone them down.

DEC 7 and 8............I ended up putting both these days on the one page, dividing the page by a splash of cream paint on one side. Last year I did a page including a docket from a grocery shop and decided I would continue to do this each December Daily. So the 7th is 2 little pockets, one on top of the other. The one behind holds a copy of the docket and for the top one, I cut a little tag from some packaging and journalled where we shopped that day. For the 8th - We visited family that morning and I gave them a little Kaisercraft bird house that I had made up for them to add to their Christmas house decorating. Just a simple little flap held with washi tape for the photo and journaling under the flap.

and then on DEC 9............We had relatives who we haven't seen for many years, visit us for a fair part of the day. That night I realized I had not taken a single photo - not one and nor did I even think to take one. So I made these little corrugated doors and created like a "visitors" scene type of thing.

The doors just open up for some journalling. I didn't want to take the risk of writing it and trying to make it fit totally under the doors, plus I had a fair bit to say so a typed up version fitted it all in perfectly.

DEC 10......... As I hadn't taken a photo on this day, I decided to add a photo of the little Kaisercraft Christmas cottage that I had decorated for my DD and her family. I took the photo just after I had finished it back in November. The background paper that I had used for the day before was double sided and had this lovely green on the reverse but it was too dark for my pastels so I went around the edge of it in some cream paint and then cut the pinkish patterned paper for today's background a little smaller so I could use the green as a border. When I journalled this page, I added it to the green area at the side where the pink is torn and also to the little tag under the one with the coloured photo on it. I've also added my pre-made tree banner to this page.


DEC 12........... Today I took a photo of my kitty cat and decided to included a photo of the present I have for her for Christmas............sshhhhhhhhh! don't tell - it's a surprise. lol I have again added in one of my pre-made embellishments AND can you see the cute kitty face I made with my date circle........sort of looks like a kitty cat's face don't you think.

DEC 13.........I did a little more Christmas shopping......almost done now. The background is just white cardstock stamped over and over with the word Christmas in pale green and cream paints and then I used a darker pink paint dabber over the background as well. AND I made a super easy little shopping bag embellishment to hang my date on.

DEC 14th and 15th..............I combined these two days with a series of photos I took over the weekend. We had our grandchildren stay with us for most of this weekend and when I sorted through the photos I had taken, I picked out the better ones I wanted to put in their own albums that I keep for them and there were quite a few "not so good" ones that I was about to delete but they told a story of how much fun we had. So those were the ones for my December Daily. My journaling can be put across the top of the page here........I've added my dated circles as a flower centre and it's a bit hard to see here but I have outlined and dotted the centres with stickles for some sparkle.

DEC 16........Firstly I've attached a little pocket to my page just simply glueing the 3 sides down and then covered the pocket with the photos. Along with the journaling tag, the pocket can hold some more photos cut in the shape of tags with a little hole punched in the top for some twine. The white lace I used has been dabbed with some green paint.
Here's the little pocket...............

and then the finished page...........

DEC 17th......I've been having so much fun playing with my December Daily that I had such a mess on my craft table and it was time to tidy it up a bit. I used a 4x6 photo of the "mess" which covered the printing on the back of some Prima packaging perfectly. I typed my journaling onto the photo before I printed it so all that was needed was a title, the date and just a little embellishment....super easy.
.JPG)
DEC 18....Then on the other side, I just needed to cover the top section with some patterned paper. Each year I seem to get one particular Christmas carol or song stuck in my head. This year "Jingle Bell Rock" is the one........it just goes over and over in my head.

DEC 19.............A "tag" page..........some lace stapled to the top and a butterfly on both sides, glittered on the front but not on the back.

and over on the back.............

DEC 20.........I have been so inspired by all these little shaker pages I've been seeing and Bec's inclusion of some cute little drawings into her December Daily, I decided to combine the two using a 5x7 plastic sleeve......some sequins in a sewn pocket along the bottom and a stamped title down the side bits.....and some special drawings from the grandchildren. (I just love those surprised looks on the faces when they spot the presents under the tree lol)
TOTALLY FABULOUS..........

CHRISTMAS ART.........I've sewn the bows on the outside of the protector on both sides. By the way, that is a drawing of a present by my littlest grand-daughter in case you couldn't recognize it.

DEC 21st.........Wrapping of some presents...........I "gift wrapped" the photo/s with some ribbon.

DEC 22nd............This is the reverse side of the patterned paper from the 21st and I loved it but it needed some white paint over it to tone it down. As my hidden journaling card was only fairly short, I added glue to the sides of the photo and the bottom and then again about 3/4 of the way down the photo, so that the tag wouldn't fall to far down behind the photo.

DEC 23.......I have found all that Prima packaging I have be stashing away has come in very handy for my December Daily. I was wondering if I would ever use it and I still have plenty left over and thought perhaps I could have done my whole album with it.......hmmm there's a thought for next year. lol. I've pretty much covered the whole of the background with patterned paper and photos. Some last minute Christmas shopping, wrapping and popping the pressies under the tree.

DEC 24..........and on the flip side........I took a bit of the colour out of the photos before printing them......still not sure if I like it though.


INSIDE the FRONT cover.......The story of the beginning of the Let's December Daily blog and how it all came about.

and INSIDE the BACK cover...........a larger pocket where I have stored some special Christmas cards and greetings.


To the rings I have added some torn fabric strips and some blue spotty ribbon (although you can't really see that it is spotty) bows, a little bell charm and a couple of small baubles that decorated one of my Christmas presents this year. One was silver and the other gold and I thought the gold would look ok but I wasn't happy with it. So I painted over the gold one with some of the blue paint I had used through my December Daily and when it had dried I covered them both in some blue stickles for a bit of sparkle.
.JPG)
Another view.......you can see the little bits extending from the pages peeping out from the side and
.JPG)
at the top.............
.JPG)
Then when it was done I decided to add this stretchy tinsel to pop around the album. It was on another one of my Christmas gifts and thought it was too cute not to use. I've tied on a couple of little charms (a tree and a star).
.JPG)
DEC 25.........I have started the 25th with sort of a title page........I have been just busting to use this little glitter pocket from HERE (thanks Mandy). I knew I just had to have a pastel one for my December Daily. I've used a 5x7 plastic sleeve again and sewn it to include the title down the bottom, some side pockets and my little glitter pocket, to which I've added a star and a tie.
and then flip it over.......I've added some of the "confetti" that was sprinkled on the Christmas table into the side pockets.
after that title page comes a small journaling page (more decorated packaging) to write about our day..........
and then some Christmas Day photos on the next page...............I love the photo I took of the grandkids kite so decided to use the lovely blue sky space to add a title to the photo before printing it.
I've cut the centre row of small pockets from a 12x12 divided sleeve and sewn them to the page. If you concertina them up and press along the folds, they will sort of sit reasonably well but do need something to hold them in place. Some lace came in handy to hide the stitching and I found a larger paper clip with a bright flower attached so a lick of paint to make a pastel flower and a bit of sparkle with some stickles and it worked a treat.
Under the plastic pockets I stuck a photo down on the background. I have photos in both sides of the pockets.
DEC 26..........and with Christmas Day over for another year.........Boxing Day was all about eating the leftovers..........I'm sure if I had continued on past the 26th, the pages would still be about the leftovers lol. A negative strip from where I had cut out the circles for my dates came in handy to pop over the photos and frame them.
I have added more to my December Daily by popping in a couple of pockets inside the front and back covers.
and INSIDE the BACK cover...........a larger pocket where I have stored some special Christmas cards and greetings.
My December Daily for this year is all done and I'm very happy with the end result although at times I did find the pastels for Christmas a bit of a challenge.
Another view.......you can see the little bits extending from the pages peeping out from the side and
at the top.............
Then when it was done I decided to add this stretchy tinsel to pop around the album. It was on another one of my Christmas gifts and thought it was too cute not to use. I've tied on a couple of little charms (a tree and a star).
cool work Deb!
ReplyDeleteThanks, Lean.
Deleteoh that looks awesome Deb. Thanks for showing step-by-step process. I need to great my December Daily Creative boots on!
ReplyDeleteThanks, Julia. Looking forward to seeing your Dec Daily.
DeleteGorgeous Deb! I really love the pastels!!
ReplyDeleteAnd I love seeing your process with all your mixed media.
Love it! Can't wait to see it finished!!
Oooh I just LOVE these covers AND the process deb!!
ReplyDeleteYay for Julia! It will be fabulous for you to join us!
This is uber creative! With your out of the box color scheme it almost begs for b/w photos...
ReplyDeleteThank you. Yes, there will certainly be some b/w photos in this Dec Daily.
Delete