


PLANS.
I saw this Heidi Swapp Christmas Memory files album on sale through the year. I picked it up, looked through it and LOVED it. Then put it back because I thought it would not be suitable for my type of December Daily (which is usually thick and chunky). BUT I went back to it and just had to have it as I loved the colours, papers and the variety of shaped pages and transparencies.

Look inside at all the gorgeous pages........


I knew that if I was to use it for my type of December Daily, I would need to make some alterations.
So firstly out came the spiral and I separated the larger pages and kept them with the covers to use as my daily pages, keeping in mind that I'd like to also add in some different papers for extra pages.

and put the smaller pages aside to use as embellishments, photo matts and extras on the page.

I have started putting a few bits and pieces together in a box (things that I think might work for what I have planned). I'm sure, as December gets a little closer, there will be a few more things added to the collection.

Cover
You may remember my Heidi Swapp album looked something like this.....

and I had decided to remove the spiral.............

The plan was to replace the spiral with rings (4) so that would hopefully allow for a bit more expansion. To do this I needed to bind the edges to cover the existing holes and so I chose to use strips of canvas paper from an A4 paper pad I had. After deciding where the rings would go, I cut a template from some spare card because I will have to use a similar binding method on most of the edges of my pages as well. I have also painted the cut canvas paper strips with Jo Sonja's Unbleached Titanium paint to blend better with the cover's background. The white paper was a little too harsh I thought. Holes punched and black machine stitching along the edges.............

and then glued with the fold flush onto the existing edge.

Now time to decorated the front and to add some fabric and lime green into the mix.
This snowman Christmas fabric with the squares..................

made it easy to make a little padded square to add to the cover............
I cut the cardboard to the size of the outside edge of the fabric square and laid some wading the same size on the top and cut one of the squares from the fabric leaving a border around to tuck under and glue to the back of the cardboard.

A bow made from hessian and a safety pin with a couple of charms..............

and also some white gauze sprayed with Dylusions ink sprays (fresh lime & cut grass)
tucked under the fabric square.................and I was done..............well almost.

I then decided to use my "scratchy" stamp just on the binding but then kept going onto the cover as well. Added the silver rings (not sure if they are going to stay silver or not yet) and the back cover.
AND I was happy with how it was looking ..........

PAGE PREPARATIONS
I have decided not to go too far ahead with preparing my pages as they are all different sizes and shapes. I thought it might be best to choose my page for each day as it comes depending on what I have to record for that day. However I have prepared the binding, ready to be attached as I create each page. Continuing on with my canvas paper as I used on my cover , I decided to randomly stamp full pages using a variety of stamps.

Then using my template, I've cut individual strips from the stamped canvas paper and decorated the edges......some have been stamped and some machine sewn. This size will fit the larger pages of my album well but some will need to be cut for the smaller pages.

I also purchased some "POP" tape which I had never used before and thought that it might make an alternate binding. I was a little worried that the thickness of the canvas paper on each page may make it all a bit too bulky.

So with that in mind I used one of the canvas pages that I had stamped (as an experiment) and had not cut up into strips thinking that I may include some of them throughout my album as well. The POP tape didn't stick as well as I would have liked so it was stitched down.

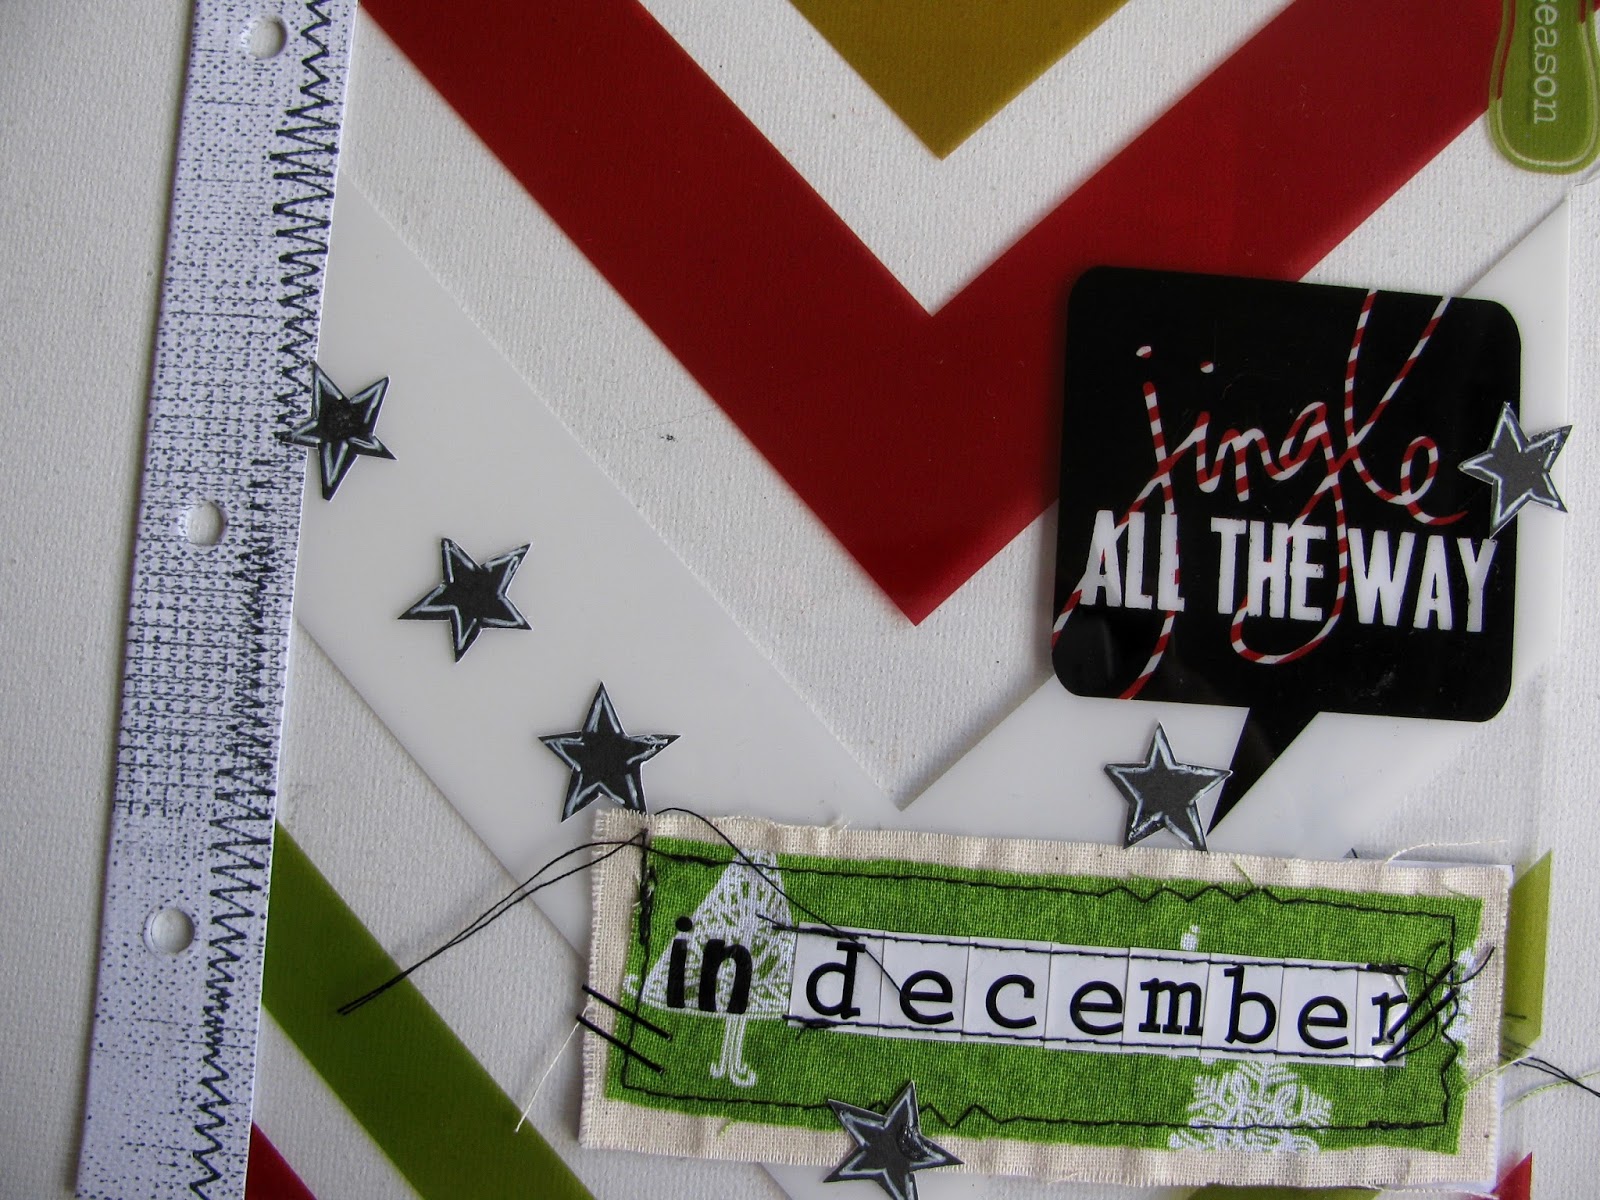
I've already decided that this transparency will be my introduction page so to that I have added one of the canvas binding strips (folded in half, slipped over the edge and glued) and punched the holes. Just a little fabric and rub on/sticker alphas added to the transparency to start my album off. I'm really liking the stamped page with the POP tape binding behind this transparency so I'm thinking this may work for my day 1............we'll see.

Opening page.

After adding the binding to these 2 pages .................
my plan was to use the transparency as my opening page and possibly the other as Day 1. Well, I've ended up using the stamped canvas page as part of my introduction page although still connected with Day 1. Just turned things around a little.
I don't have a lightbox but the window worked just fine. Putting the canvas page over the transparency and roughly drawing in the lines of the pattern behind.


Adding in little bits and pieces to fill in the pattern. Some journalling, water colour, ribbon, paper bits and doodling.

Not too concerned that the middles didn't meet as an enlarged photo printed on white cardstock was
going over the top.

and with some added gems to the red tree decorations, glitter in the star and some ric rac along the bottom, it was done. (I also added a black tree trunk as I chopped the bottom off in the photo)

Then added to the front of the transparency some little black stars outlined with white pen.
and inside some journalling placed under the bits on the front so it wouldn't be seen from the front.

Closed - it looks like this.........

Then it was onto DAY 1.

Using one of the original pages from the album, which didn't completely cover the back of my canvas page, I've attached some POP tape to the other side of the page.

A 3 x 4 journalling card for some hidden journalling is marked out on the back of the page with some tape away from the edges so it will form a pocket when the page is stuck to the back of the introduction page.

Creating my page for the 1st and adding some trims to the front of the plain journal card (tree and birdie stickers, rub ons and some water coloured grass)

and journalling on the back.........

A wooden number 1 inked with black stazon and added to fabric bits.............

some stickers stuck into a blank square to finish the "blocked" pattern on the page........

and my page for December 1st is done.............

DAY 2.
Two pages were needed for Day 2 so I decided to add in a 5 x 7 plastic sleeve.

Using my fuse tool, (which I'm still getting used to and the "fusing" is far from perfect) the sleeve was divided into smaller sections, encasing each photo/journalling as I worked my way from bottom to top.

You may be wondering what's on the other side of the sleeve. Well, I was a little excited to start my December Daily and get my Day 1 recorded early, but that evening, some surprise visitors (the chief decorators of my wooden cat family) arrived, which ended in more photos that just had to be included. So matching photo sizes with what I had for Day 2, I've ended up with an added page for Day 1.

So it's looking like this in the album now.........
Day 1

Day 2

DAY 3.

Making a little cluster including a tag (a smaller page from my original album) and a couple of 3 x 4 pocket cards as a matt for a cut out photo...........

I've added a scrap of folded cardstock to the back to form a little pocket so that the "believe" journalling card can sit in place and be part of the cluster and also pulled out to read the journalling.

DAY 4.
Incorporating a different patterned paper now from what was in the original album, a smaller page with a transparency stapled over the top of the photos.

Day 5.

The back of my day 4 looked like this, so using a smaller original page from the album which wasn't quite big enough to cover the whole back of the page, I've added some hessian ribbon to the side.

and used the punched binding holes from the page to thread through 3 strands of twine.

A little tag made from white card, some patterned paper, stitching, a cute sticker and a heart clip. I have added my journalling to the back and popped it in the little bag behind the photo.

DAY 6.

The flower was made by placing the circle die cut over some red and drawing in the petals and cutting around them.

and pages 5 & 6 in my album..........

DAY 7.

Adding in another patterned paper. I've printed the photo on the bottom half of a 4x6 adding some text and then used the top half for my journalling.

Day 8.

This page from the album had a peek -a -boo heart cut out on it and as much as I loved this, I decided for this one, I would cover it up. So glueing a scrap of double sided paper over the heart

and then covering that over with my journalling card for this day....

I was then left with the reverse side of the scrap paper showing through the cut out for day 9.

Day 9.
Adding a little die cut heart inside the heart for my journalling and some kindy glitz to outline it. The ribbon tied onto the tag sits out of the album up the top.

Using a smaller page from the album (in the shape of a tag) which I had kept aside as an embellishment. Having the same pattern as the page I was using for Day 9, I decided to add a strip of striped paper under the punched binding holes and matt the tag on some red. I'm thinking black might have been a better option now that I look at it.

Day 10.
This page is made from a giant manilla tag..........Some hessian ribbon at the top which again will poke out from the top of the album and finished off with a button.

Sprayed the tag with Dylusions "fresh Lime" ink spray first......

Then a piece of black cardstock with a torn bottom edge is placed over the top .......

This is the back of the tag. To the top I have stitched some hessian ribbon but only anchored to Day 10 at this stage as it will make it easier to plan Day 11 without the hessian being attached to that day just now.

AND as I was looking through some of my photos I came across photos that I had taken back in November which relate to this Christmas. They were photos of decorations and keepsakes that I had gifted before the 1st December. SO I had the idea that I would make some easy tags to include these photos..........firstly a double manilla tag with some random stamping on the inside.

Covered the front with patterned paper, washi and some stamped decorations (I rubbed over the stamps with some neo colour pastels then spritzed them with water, stamped and they came out with a watercoloured effect)

and inside the tag......the photos and journalling.........

Another tag - covered the front with a smaller page from the album........

and the photo on the back with room for journalling.......

Now where to store these tags............right here on the back cover of the album. I've added little banner with some stickers across the top of the pocket and some alphas.

The pocket is made from another smaller page from the album, a border made from left over binding and continued the stitching around the pocket........

underneath........I've cut a piece from a plastic sleeve and popped on the back so that it seals the window without covering it up (stitched around the frame) and using scraps of cardstock I've added 3 concertina bits to make the pocket expand. (Yes I'm thinking I might be adding more bits to this back pocket throughout December)

When it's glued onto the back cover you can see how it sits up to make more room in the pocket.

Day 11.
A pocket to hold a copy of a grocery docket and this year I also added the grocery list that I wrote before going shopping. Thought it might be a bit of a laugh for someone in years to come to see how many more groceries ended up in the trolley than what was on the list. I've been including a grocery docket in my December Daily for quite a few years now. After the tag was finished on this side I've stitched across the hessian ribbon only, to keep it in line with the day before, and glued it down along with a green twine bow. The button on the pocket is one of the circles from the black & kraft spot paper you can see on the background. Left the wooden "day" numbers natural on this day as they were going on the black.

This is how the back of the tag from day 10 looked and realising my desk needed a bit of a clean up, I gathered up the scrap paper and cut it up into random "squares" to use on the background.

Glued them down just as randomly and set about drawing in between them with a black neo colour then going over it with a water brush.

and it ended up looking like this before putting on the pocket.....................

Day 12.
A snowman cut from the same fabric used on the front cover, stitched to some card and glued onto a 6 x 4 journalling card. (The tag showing at the back came later on Day 13 but I had forgotten to photograph before hand).

So opened up, my December Daily is looking like this............getting quite full now.

Day 13.

Glued this tag across the back of my 6x4 journalling card from day 12....

and then tore a smaller journalling card to cover the top and bottom of the ruled card and repunched
the ring binder holes......

Day 14.
Tearing up a previously misted paper doily and glueing randomly to the edges of the page and adding a collage photo and some alphas. A scrap of paper used as a small tag for the date.

Day 15.
A large paper clip with a fabric tie and tree charm holds down the bottom photo.

The top photo is glued on 3 sides only to form a pocket for a 3 x 4 journalling card. The bottom photo folds out to reveal 2 more underneath.

The 3 x 4 card under the fold out piece has been machine stitched then sanded over to rough up the stitching and distress the card.
Day 16.
Using a black and white photo for today with text on the photo and a coloured cut out photo of the pom pom trees. Also some trees cut from fabric as well as a decorated die cut tree used as embellishments.

This page from the original album had a little cut-out so I decided to paint and decorate a wood veneer bauble and have it "dangle" from the top of the cut out. It's tied, glued and stapled to the top so should be quite secure. As the album gets close to being finished I will see if the "dangling" is going to cause any problems as I turn the pages and if so, I can attach it by some thread to the bottom of the cut -out.

Over these 2 days, I had some beautiful drawings and paintings done for me so I decided I would decorate a kraft coloured envelope to pop them in to.

Some gauze along the bottom dabbed over with some Jo Sonja's Opal dust, a snowman sticker and crystal kindy glitz for snow.

and that can be popped into the pocket on the back cover.

Day 17.
Consists of 2 pages......the first being the reverse of the page where I have hung a wood veneer bauble from the top of the cut out. This page includes the title and an arrow pointing to the 2nd page of photos.

Using a smaller page from the album as a flap, I've attached it in when I added the binding to the main page. A bird die cut (which has it's edges inked in black) is glued to the flap....

but before I attached it, I had traced around it onto some scrap paper (in reverse) to attach another bird to the inside of the flap. Added some cotton to it's beak and then to the journalling circle.

Days 18 & 19.
are both included on the one page.

Day 18 is a smaller page from the album, turned up at the bottom and stitched to form a pocket for a journalling card made from black cardstock and then has a die cut attached to the bottom to separate it from day 19. It was then glued to the top section of the base page and a small piece of patterned paper glued to the bottom of the base page to hold some typed journalling for the 19th.

Day 20.

A piece of paper glued in behind the tag shaped cut out on the page and outlined in black. White gesso on the page and sprayed with blue and green mists and stamped with stars for a background for the cut out photo.

Also to the back of the page I have attached a packet to fill in the "curve" space on the edge of the page and also serve as a pocket for a journalling tag.

and because I had the paper glued to the back to fill in the cut out and also the packet glued to the back, I traced the outline of the page onto some black cardstock to cover the back of the page for the next day.

Day 21.
Added a scrap of glitter paper to the edge of the black cardstock and used the back of the same tag used for Day 20's journalling........

to journal about today's events........

Day 22.
is just a simply decorated 6 x 4 journalling card with a reminder of what I had to do for the day.

This is what it looked like when I drew up the card in the morning..........and then finished it off at day's end with some extra colour (water colour) and ticked off what I had done and time.

Day 23.
is a 4 x 6 photo with text added before printing and glued to the back of Day 22's journalling card.

Day 24.
Typed strip journalling was added to the top flap and a banner placed across the top of the base page.

Top page lifts up - added a little gesso to the underside of the flip up piece and made a Christmas tree from some bits that were on my scrap table (I think it looks a little more like a cake than a tree lol) with stickers underneath the tree. Flap opens up to reveal photo of wrapped presents matted on a piece of the wrapping paper I used this year. The little owl is also cut from some wrapping as well.

Day 25.

Some stamping over the page with white gesso and added 3 coloured rectangles of paper from a smaller page from the album and attached them with washi tape to open and close.
Photos were glued to the base page, journalling under the flip up piece and some little pom poms attached to the bottom of the photo to peek out under the flaps. Some stickers on the top of the flaps finished them off.

Making room for more Christmas Day photos.......using 2 pages from the album and a 5 x 7 plastic sleeve, I've aligned them so that the flap from the bottom page will still flap over the top of the added pages. That meant that the photo sleeve and black and white striped page had to sit out from the base page a bit.......

and then after stapling together it had to be trimmed so that I could get the binding onto a straight edge.

Glued on one of my pre made bindings to form a type of a little book.

The front was decorated with 2 squares of canvas paper with glitter added and then the snowflake cut out placed just under the window on the base page. Santa sticker on the bottom square and washi tape for decoration.

Opened out - Under the top page, I glued in a 4x6 journalling card decorated with some washi tape and a couple of tags.

I made 2 photo collages of our Christmas day photos and printed them onto two 4 x 6 pieces of photo paper which was a little small for the plastic sleeve so using some of the canvas paper I used that as a matt to fill the now slightly smaller 5 x 7 photo sleeve.

Day 26.
This is the final day for me in my December Daily. Super easy page, photo matted on a 3x4 card
and then matted again on black cardstock.
and then matted again on black cardstock.

and on my back cover, I have added in some little extras. Popped a couple of Christmas cards in the pocket as well and a couple more tags that I had previously made and thought they could hold some extra photos on the backs of them. Also to the pocket itself, I have added some extra cut out words, a butterfly and some gems to the stockings and stars on the banner.

I was a little worried that the tags I had put in the pocket may fall out so I glued and stapled the ends of the twine attached to the tags, to a circle die cut and then attached that to the back cover

so if they fall out they are still attached.

My finished December Daily for 2015. I've added some ribbons to the rings and a black elastic band around the side because.......

as always my December Daily has ended up chunky AGAIN.

I purposely pulled the spiral binding away from this Heidi Swapp album hoping it would give me more room/flexibility with rings. Flexibility, yes - I was able to remove and use the beautiful shaped/patterned pages how and where I wanted and completely change the album to make it my own. I'm happy with that.

I must say though, after having a complete change in 2014 with my "art journal" December Daily, I thought I would be ready again this year to get back into more of the "usual" type of December Daily that I was used to doing. Not too sure I enjoyed the process as much as 2014's big change. 2016 needs to be different again for me I think..........something that I haven't done before. Maybe vintage - upcycling - a different format. Right now I don't know EXACTLY what I want to do, but I have all sorts of thoughts going through my head as to what I can do to make this year's (yes this year's -2016) a little different again.
---------------------------------------
HERE....
And if you have your Covers done....
upload them HERE
And you can even share your previous December Daily's
HERE
We'd love to see them!

It looks totally amazing Deb!!! I love the graphic red/white and black/white stripes and your jolly snowman. The scratchy stamp finishes off really well. I know I've got an A4 pad of canvas somewhere - never thought to use it like you have have - such a great idea!!
ReplyDeleteThat is a heck of a lot of work! Worth it though...love the padded image & my faves the bit is that beaut hessian bow!!!
ReplyDeleteStunning! You are one very talented lady Deb! Loving that scratchy stamp, what make is it?
ReplyDeleteThanks, Jane. The stamp is darkroom door (scratches) I love it.
DeleteSuch a fabulous cover. Love the great variety of texture!
ReplyDeleteWow that is so cool! Love that cover, I agree such great textures going on with it :)
ReplyDelete