


The inside cover...........

The art journal I'm using this year for my December Daily pretty much has two covers, an outside main cover and the actual front cover of the journal itself. So I have decided to leave the outside cover for now and concentrate on the journal cover. Two reasons for this, one is that I am a bit concerned that the outside cover is going to get a bit messy as my December Daily progresses (I usually make a huge mess on my table when using paints, mists etc and will probably end up putting the book down in a pile of paint) and secondly, as I am not planning any particular colour scheme/theme type of thing, I wanted to wait until it is all done and will have more of an idea of what I want for the overall cover.........maybe something very simple if I have gone a bit extreme on the inside lol. The envelope on the opposite side of the journal can wait too until it's purpose has been properly decided.
This is it's 'before' look and the first thing to decide is what to do with the red binding, unsure if I wanted it there or not.

So with decision made, I wouldn't completely cover it, just disguise it a little. I covered the kraft cover with some Kaisercraft "kaleidoscope" paper. It had an interesting background pattern that I wanted to show through but lost some of it in the process along the way. After a very light and random coat of white gesso, then adding some stamping (script, stars and a few very crooked trees) you can still see that great background pattern at this stage.

To try and bring the red colour across the cover from the binding side, I used a red inktense block, rubbed it on and then brushed over with water. Then did a bit with a green inktense block, taking it onto the red binding and also rubbed on some teal mist in patches. Baby wipes came in handy to wipe it all back a bit to reveal a bit more of the white gesso. A few splatters with orange, black and teal mists and it was starting to feel like I was heading in the right direction.

For my title........the "welcome" is some rub on alphas and the "DECEMBER" is negatives of old alpha stickers backed with a scrap of black paper. (I ended up wiping up some of the oversprays/spills from the cover with these newly created alphas so the white background ended up coloured).

A quick and easy Christmas tree cut from the reverse side of the Kaisercraft background paper - in rough triangles, stitched, sanded, glued together AND then came the doodling with white pen. Add in kindy glitz to some of the stars, colour in the others and then some bright green drops circled around in black pen. Oh, the stitching along the binding is a rub on and the baubles on the tree are just cut with a 2 hole punch. The extra circling around the baubles gives them a bit of height.

With that done, I decided to make a continuation of the cover (replacing a title page) on the inside. I can't ever remember using the gesso resist technique before so gave it a go and loved it, but seriously need some practice, also need to anchor the pages down with a paper clip on both edges. I tore off part of the page (on the right below) first so that the 'December 1st' page (when completed) will partially peek out. Stars are stamped in black stazon ink and used the white gesso to stamp the words "This way" along with the masked chevrons and rectangle things.

When it was dry, I sprayed with a few different mists and dabbed with some paper towel to reveal the gesso. I definitely think I needed the gesso to be a lot thicker on my stamps. Never mind, I will be trying this again and practice makes perfect so they say.

After drying again, I rubbed on some green gelato in patches and started outlining some areas. Finishing with a script stamp, a few sparkly stars and some red, black and green mist splatters

and I'm ready to go.
(I did glue the first page to the inside cover so that it opens straight to this page.)
------------------------------------
A little pre-planning..........


(I did glue the first page to the inside cover so that it opens straight to this page.)
------------------------------------
A little pre-planning..........
Unlike last year, there's not a lot to do in the way of pre-planning for this December Daily. It will just flow from December 1st. BUT I'm really really busting to make a start of some sort. I have too many pages for the days in December, so in between the days I plan to put some random bits about Christmas like Christmas carols, recipes, childhood memories etc. With that in mind, I thought I could make a start on a Christmas carol, done on some deli paper all ready to go into my art journal.
This is how it progressed..........
I stuck down strips of masking tape to the deli paper, tearing the top part
and leaving the bottom line straight.
Next came the paint.......as I went down the page I added white to the original colour
to get it quite light at the bottom. Then splattered it all with a lime green mist.
Some masking of circles in white paint and random stamping.
Outlining parts in white pen.
Then off came the tape. I also tore along each side of the deli paper
to make it fit better on my journal's page size.
I then started printing a Christmas carol in the gaps left by the tape.........
The complete song was never going to fit on here so I just starting writing
and hoping that I could at least finish off at the end of a chorus which did happen.
This is now all done and ready to be glued into my December Daily.
I think it needs a bit of red, so when I come to it's spot in my journal
I'm planning on base coating the page in white and doing some stamping
in bright red and hopefully that red will show through the deli paper.
We'll see how it goes.
------------------
December has finally arrived and I'm super excited to finally make a start in my
December Daily Art Journal.
You may remember my first introduction page was a continuation of the cover............well this is how it looks after I have done my Dec 1 page. I had torn a strip off the right hand side of the page to allow the December 1st page to peek out.

and then turn the page over to DAY 1..........

Now I have tried to do a photo transfer a few times before with VERY poor results so I was a bit scared to try this straight into my journal but in I went and the result isn't perfect but waaaayyyyyy better than previous attempts.
Firstly I reversed the photo taken of my outside Christmas tree and printed it out on plain paper on an inkjet printer. Then smeared a coat of white glue onto my journal page and placed the photo face down into the glue and smoothed it out and left it to DRY. I think this may have been the reason for my failures before - not letting it dry enough (I'm sooooo impatient). I then spritzed it with water and began rubbing it back and finally my photo appeared.

So I painted in the grass and sky and my next step was to make sure the "oday" matched up with the "T" from the previous page and that the "monday 1st" was going to peak out when it was turned back to the previous page.

With this done, I could then start adding the little extras and my journalling which is all about how much our outside tree has grown since last year.
THEN it was on to what I am going to refer to as my "in-betweeners" - pages that I will do in between the days - either memories from the past or something Christmas related.
So I thought this would be an appropriate time to include a memory of our family Christmas tree when I was a little-y (a long time ago).

The background was done by stamping with a scratches stamp with stazon ink first and then using my inktense blocks - firstly the green and blue for the tree and pot and when that dried the mustard applied in patches. Simply just wet a paint brush and rub it on the block and paint away. I gives such a gorgeous watercolour effect and is soooooo easy.

I went over the tree and and other areas with some cold tea......that's how I got the brownish bits. Then a good splatter with a mist. I did some strip journalling on tea stained paper added some more stamping and some rub ons and some more splatters. The outlining of the tree was done with the edge of a stazon ink pad.
DAY 2......

Firstly some random stamping on the page with black stazon using script and woodgrain stamps. Then I went over a section there on the right hand side with some white paint. Traced around the Dylusions (Flossy) stencil in pencil on this white area and gave her a shopping bag.

Mixed some red and orange watercolour paints together and painted around the trace area but it was all a bit red for me so out came the white paint and I dabbed it through a burlap stencil in places. The word shopping was traced from an old alpha stencil onto a page from a magazine and the "spend" words were cut from there as well. Stamped the date and added journalling .
AND THEN came the idea for an in-betweener......

Had no idea on how to draw a shop window so thought a rectangle would be a good start lol so that was painted in black, later to be outlined in white. When it was dry, I placed down a chipboard dress form and misted with a yellow and red then added grey paint to the negative of Flossy.

The little dress on the dress form is blue tissue paper stamped with a darker blue and the window shopper's shirt is made from dress pattern tissue paper.

Then is was on to DAY 3.............a photo extension.

Glued the photo to the page really well making sure the edges were well and truly stuck. Roughly drew in some tree branches and filled in the unwanted background on the photo and spaces between the branches with sky blue paint.

Time to paint the tree.......the brown looked like the perfect match when it went on but as it dried it wasn't quite right but still happy with the result. For the shading on the branches I rubbed over the wet paint with a baby wipe (baby wipes are my new best friend) then added some black and white paint. Added the leaves using 3 different greens and painted in some grass below.
DAY 4 looks probably more like a page for the scrapbook rather than art journalling but it worked for me on this day.....

The background was painted black and some squares cut from scrapbooking paper (which I did stamp with a script stamp to take the starkness off them) and placed across the page leaving some gaps. I stamped in the squares for the journalling and added a few more bits and pieces.
DAY 5 and my mailbox was filled with Christmas catalogues ..........so after browsing through them, a couple were put to good use.

For the background I painted on 3 colours and misted with water.

And then laid some plastic wrap on top and moved it around to get some creases, also to move the paint a little too. Not sure that my choice of colours was the best as the orange became a little "dirty" looking when it met with the blues and greens but in the end a lot of it was covered up anyways.

After it had dried I added some stencilling of white circles which I later stamped around using different sized lids dipped in black ink.
DAY 6 - a play with some stamps and water colour pencils. A collage photo of flowers in my garden and anchored the photo with washi tape.

DAY 7 - I joined what was to be an "in-betweener"
and a day in December together divided by a cut down page.

So it was done over 4 pages adding mesh tape from the hardware store (no idea what it's real use is for but I love it) to the first and fourth page, then gesso-ed over the whole 4 pages.

Added some aqua paint to pages 1 and 4 , some stamping, some splatters and then cut the middle page down to act as a divider between the 2. You can see some of the paint has gone onto the divider ( as a bit of an after thought, I closed the pages together to get some of the paint/mesh pattern onto the page that was going to be cut down but the paint had started drying a little so didn't really get the effect that I wanted). Used up some old alpha negatives over some patterned paper to create the word keepsake on both sides of the divider.

DAY 8 - Painted a "negative strip" for my series of photos then came the journalling and finally painted over it with red and green mists.

Then on to DAY 9...........

I used some texture paste on Santa's beard and hat trim and then painted over it with white when it had dried. Added masking tape to the red painted area and rubbed some ink over it with my finger to pick up the grain in the tape but wasn't happy with the result so went over it with crystal kindy glitz and added some sequins. It is much sparklier irl than it shows in the photo.
DAY 10
After stamping the entire page, it was then painted over with a yellow Inktense block. I love these - just wet the brush, rub onto the block and paint away. Then came the heart outline and that was painted with a red Inktense block. The "hands" were traced onto some baking paper painted with white acrylic. This was as far as the page was going but just had to include the super cute and "very special to me" drawings done by my grandchildren. Note the angry looking Santa is apparently looking at his "who's been naughty" list. lol

DAY 11
Some old story book paper and a diecut were glued down well , the corners stamped and a "scratchy" stamp was then used all over. Then I went over it all with a white wash (watered down gesso). I altered the photo to match the scratchy weathered background.
For the word "tradition" - I added strips of washie tape to some scrap cardstock and drew the word onto it with permanent pen and cut out the letters.

added the white wash.....

strips of washie tape over some scrap cardstock.........

DAY 12
Painted a stormy sky and when that had dried, sprayed with mist and let it drip down the page. After the photo was added I continued the drips over the photo.

DAY 13
Sprayed and splatted with 3 different coloured mists, mopped it up with some paper towel and then used this paper towel to make some arrows. I was a little worried that the machine stitching would tear the paper towel but using a very small stitch worked fine.

DAY 14
The background was painted black and then sprinkled with glitter while still wet. When it had dried I stamped on the stars and date using white paint.
The houses were cut on the Big Shot and some paper put in behind the windows and kindy glitz added for sparkle.
The three houses on the right are glued together at their sides and then attached to the page only on the outer sides and bottom to form a pocket for some photos. Felt pens were used for the lights around the border. I used these same colours to colour some cardstock and used a hole punch for the lights strung across the houses.

and then looking at the Christmas lights prompted me to do another in-betweener.........remember THIS bit of pre-planning I did.
Well this is how it looks now..............
Simply by painting the page with white gesso, stamped with red poinsettas and outlined them in black, glued down the prepared deli paper sheet and painted around the edge with the same green mist I had used for splatters on the deli paper.

White gesso base, stamped with red and outlined in black.......

Then it was onto DAY 15.
I used up some old alphas for the word "decoration" glued down securely and painted over with gesso. Then dry brushed (loaded the brush with paint and then wiped most of it off on a paper towel and brushed over the page so that the majority of the paint touched the high parts - the alphas) over them when the gesso was dry. Used a few different colours here.
I did a photo collage of our tree decorations and then cut the photo into a tree shape and stamped some presents under the tree and used water colour pencils to colour them and the border.

a mix of old alphas.........

DAY 16
was an experiment with canvas , as I had never tried mists on it before. So sprayed with the mists then with water, the colours really blended into each other. Painted around the edge of the pages in black, cut the canvas to fit and glued onto my pages for the background. I popped a piece of masking tape down the centre of the page as I may have just cut the canvas a little bit too small.
I also used Mandy's idea of attaching some transparency to the page on the right.

including a small piece of transparency..............

DAY 17
was hot so I had a go at drawing a melting snowman. Now I have never seen nor touched snow in real life, but I decided to add texture paste to the snowman's body. When it was dry I painted over it with white acrylic along with the sun in yellow and his hat in black. The sky and grass are done with Inktense blocks. I've rubbed some crystal kindy glitz over him but it's not showing up so well.

my outline to guide the addition of the texture paste.........

DAYS 18 & 19
I decided to do both these days over the one open page. Day 18 was much the same as the previous day only Mr. Snowman had melted a little more.
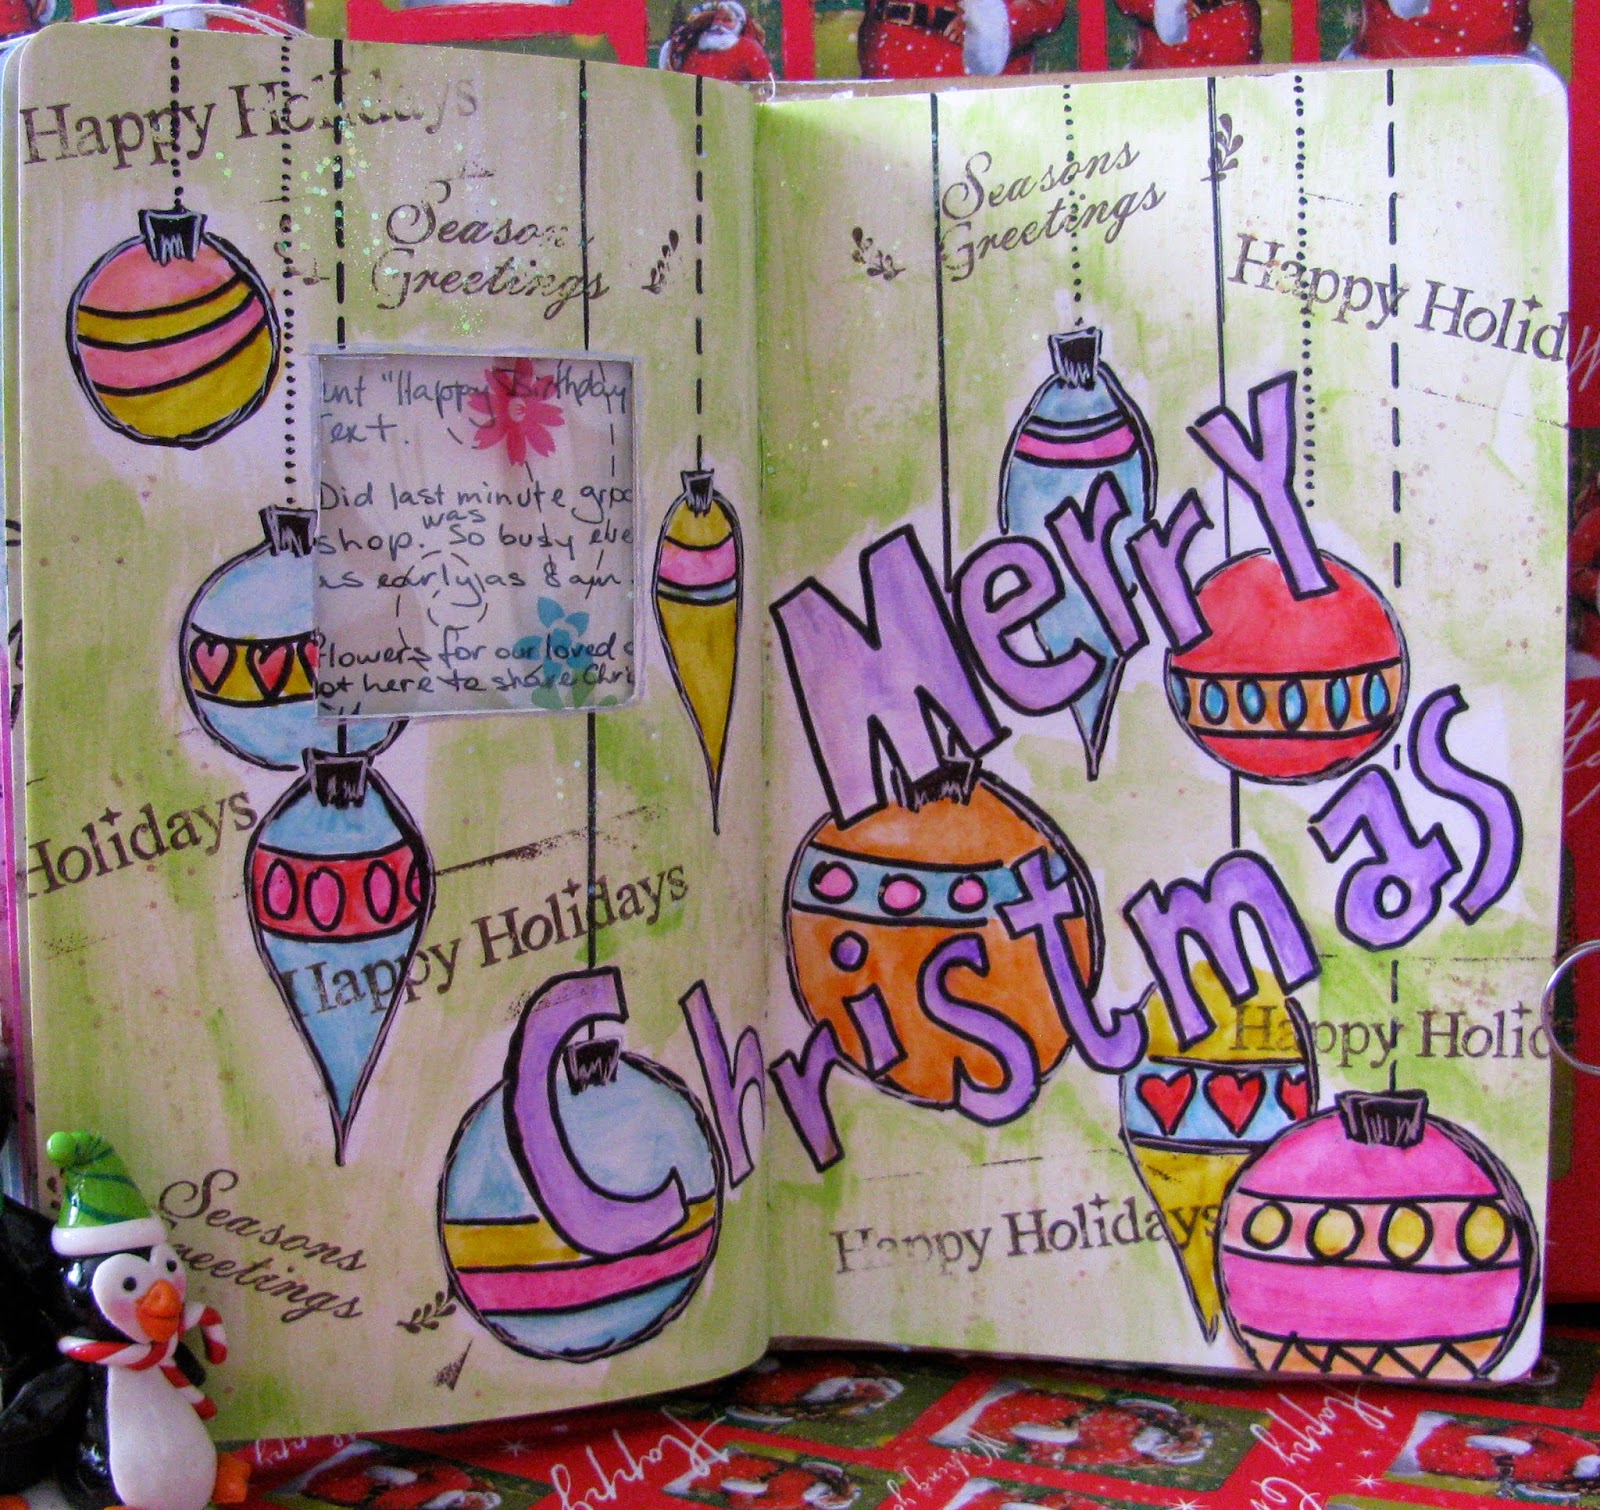
Every year, in my December Daily I like to include a photo copy of a docket from at least one grocery shop in December. Someone might be interested later down the years at the cost of these things. So Day 19 - a little pocket (to hold the grocery docket) was made from a scrap of deli paper I had played around with a while back. Although you can't see much of the background now that the page is completed, I have used torn strips from grocery catalogues to add texture before painting over with gesso and then adding some mists.

DAY 20
I sprayed the right hand side heavily with mists and then closed the pages together. "today" and "everyday" were traced using a stencil then doodled to fill them in and gave the photo a doodled border.

DAY 21.
I wanted to try the gesso resist technique again so applied white gesso through a circle stencil then sprayed with mists and used paper towel to dab over the page to reveal the circles. Stamping of the baubles (the circles on these were coloured with mists) and added twine to hang them.

DAY 22.
was gift wrapping day but instead of taking my usual photo of the gifts wrapped and under the tree, I decided to make some presents from some of the left over gift wrap I had used. The background was painted in the darker blue and then sponged over with a lighter shade of blue. Later it was stamped over with gesso on snowflake stamps and the larger ones were sprinkled with glitter while the paint was still wet.

DAY 23
First was the stamping with black stazon and the journalling lines drawn with a permanent pen remembering to outline where the photo would go first. Painted with mists and sprayed with water to let them run into each other. Lots of splatters and sprinkles done with a toothbrush and white paint.
Then I just started writing and lucky for me I had enough journalling to fill up all the lines I had drawn.

DAY 24.
This became a day/night page. Taking inspiration from Mandy's gorgeous Book of Lists (just love this idea). Glued a large tag to the page, stamped stars then used green and blue gelatos to fill the background and over the tag. Shaded the outline of the tag with water colour pencils and filled in some of the stars. Onto the night page.....used a transparency window again inspired by Mandy. After I had painted the background a dark navy I brushed on some opal dust when it was dry. This is very sparkly.

and that page led to another "in-betweener"....... Basically all done with watercolour pencils and a green inktense block to colour the background.
DAY 25.
This was done over 4 pages. Printed out a collage photo onto plain paper, stuck that to the first page then glued some paper (which I received as a gift wrap) over this page and pages 2 and 4.
It all seemed like a good idea at the time but I can tell you, it was as trying as covering school books with contact. This paper had a "plastic" feel to it and it crinkled everywhere when I tried to spread it over the page......grrrrr. Trying to pull it off was useless so it stayed. I used a different wrapping paper for page 3 then folded it back to form a pocket to hold a 4x6 photo of the collage, a tag about our day, a recipe and also the food we ate for the day.

the 2nd page folded back to form the pocket.......I've attached a length of twine to the outside of the pocket (Santa sticker is holding it down) and then punched holes in what I was putting in the pocket and tied it with the other end of the twine so that if it falls out it is still attached.

DAY 26
The letters, journalling and stamping was all done first with permanent pen, then painted the letters with mists and the background with yellow inktense block.

I'm back to show you what I have done with the envelope that is attached to the inside cover of my art journal and also my finished December Daily outside cover. I had left both of these untouched until my December Daily was completed.
This is how it looked................

I've since decided to use the envelope for some cards and Christmas messages. I cut patterned paper to fit the front of the envelope and added a little corner of embellishments including some postage stamps.

Then it was on to my main outside cover........I left this for two reasons.......one because I thought it might get ink or paint on it as I was creating my daily pages and secondly because I had no real plans for a colour scheme/theme for my pages at the time, so thought it would be best to leave it until it was all done and then match the cover to the pages.
So this is how it looks now....................
The cover was painted with white gesso and "rectangles" were cut from scrap paper that either was used somewhere in the album or something that would tie in with the colours used. When the gesso had dried I glued these down on the front and back, leaving the spine.

I then went in between the rectangles, around the edges and down the spine with grey paint and then wiped it all back with a baby wipe before the paint had dried.

Add doodling around some of the "rectangles" in white pen, stamped stars, added stickers (holly, stars and title) and washi tape. It was missing the colour 'fushia' which I had used in the album so splattered it on with a mist.


The heart was part of a gift bag that I received, so thought it could be used here for some more pink. Attached with twine and I was done............

My album is a little more chunky than I thought it would be so I was very happy to have that elastic band to hold it together.
This looks incredible fun Deb! Great steps to achieve what you've created... light and bright - and festive!
ReplyDeleteCant wait to see this unfold!
oh how perfectly awesome!! You've got me all festdoodled (in the festive mood) now lol...I won't make any grand promises but i'll tryyyyyy and do a DeC dAiLy too (just getting back into scrapbooking after a 6 month hiatus) :o)
ReplyDeleteFABULOUS....right up my alley with all those lovely bright colours & MM work.....good on you with the gesso resist idea...my favest bit is the Chrissy tree, it's BRILL. I want it!!!!
ReplyDeleteWork of art! I'm totally in awe! Love those letters on both pages and what a difference the outlining makes. Gesso is now on my wish list.
ReplyDeleteWow Deb love it.
ReplyDeleteYour book is amazing! I am in utter awe of your skills!
ReplyDelete