
Kit & Ideas
Oh
how exciting to finally be able to reveal some more! This is album
number six and a different size and shape and feel to all the previous
five!

And
that's where my ideas for 2016 began. I knew as soon as I saw this
digital kit that my colours were set. It's not even a Christmas themed
kit, but I was just so smitten by the colours that I decided there were
enough elements in it that would be fun to Christmasfy - is that a word?
Well it is now!

The
album and some papers came next - just sort of jumped into my basket.
Many of the 12 x12 papers are Simple Stories Bloom & Grow and the
6x6 pad is Kaisercraft Sea Breeze. Loving this selection of
non-Christmas stash!

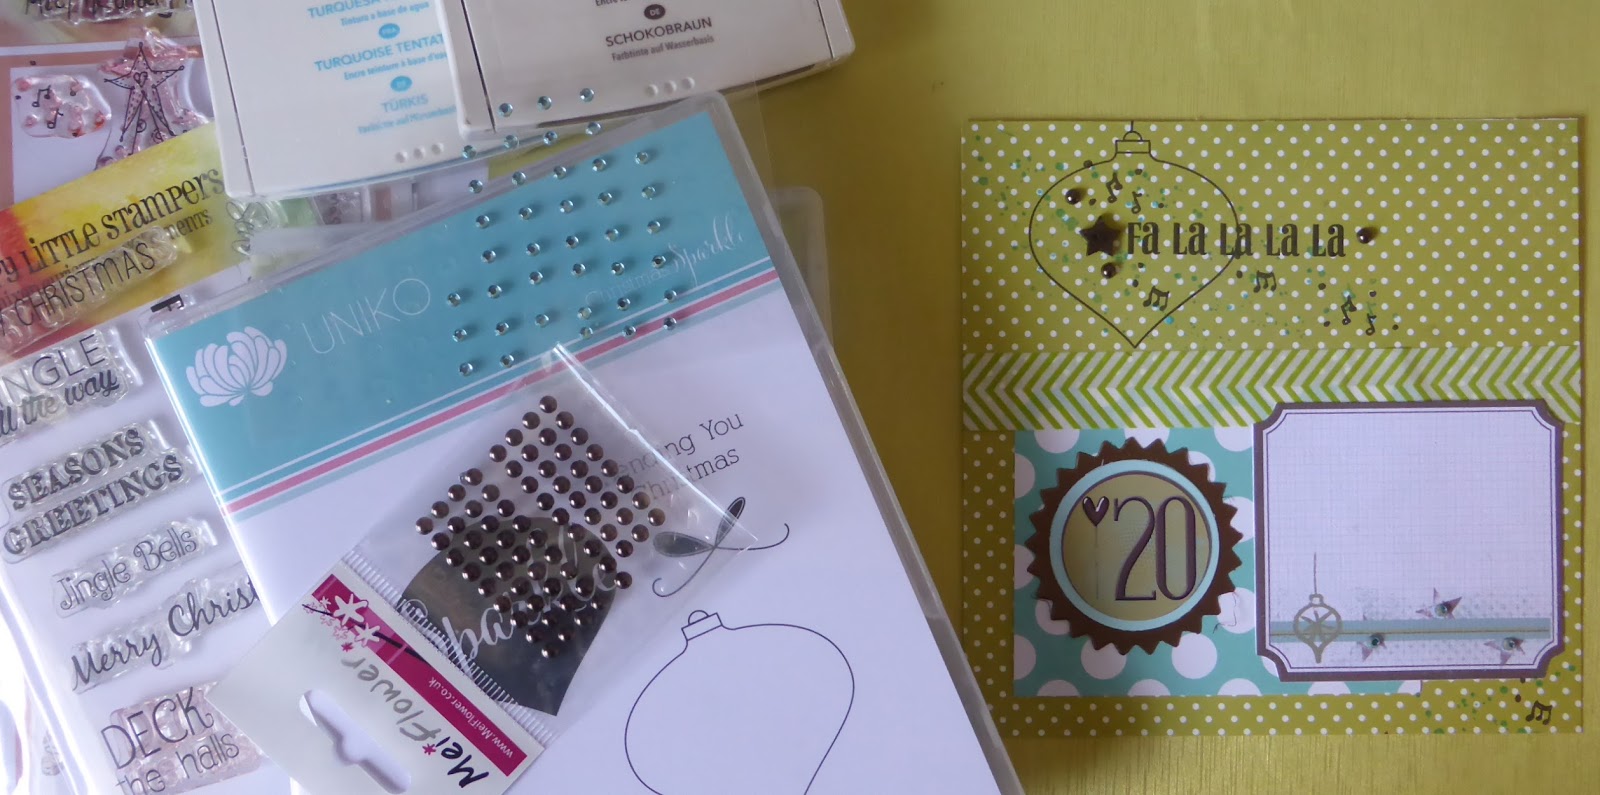
Then
of course the time to add Christmas elements came. So some leftover
bits from previous years were added to the mix. And brand new totally
adorable stamps sets .........

..........joined by old favourites and a growing collection of bits and pieces of shiny ribbons and embellishments.

So
that's my 2016 December Daily supplies introduced - a Project Life
style album which will contain 6x6 photos, a mix of digi and traditional
paper crafting journal pages in brown, acid green and aqua blue plus
lots of stamping. And maybe the odd outside of the page protector insert
and a hint of red creeping in - can't avoid red at this time of year!
My album cover this year has movement!
I was inspired by a Christmas card I saw in a magazine that had things pegged to a line and a little light bulb went ping!

I collected together all the bits and pieces I thought I might need and set about making my washing line by attaching some hessian looking ribbon across a piece of Simple Stories Bloom & Grow woodgrain paper.

I knew I wanted to include some hanging gems, but at the time of making I didn't have any green gems. So I used some white pearls and coloured them using a promarker.

Then I needed to find a way to suspend the gems - yes beads would have been much simpler, but they had yet to jump into my shopping basket! So I had to be a bit inventive and cut a couple of strips of acetate and arranged the gems on them.

I really liked the Christmas tree Project Life card and knew that would be the first thing to get pegged to my ribbon line. Next I die cut two stars from patterned paper and adhered a sticker on one and stamped a greeting on the other. And then everything got pegged onto the line.

My final job was to add a title and year. I used alpha stickers from Simple Stories Snow Patrol

And I couldn't resist adding a few mini stickers on the stars and around the words and numbers too.

As you can probably see I haven't adhered the cover to my album yet. That's because I'm trying to find a way of protecting the very easy to remove elements - especially by inquiring little fingers - without compromising the movement of the washing line. I'll be getting back to you on that soon.

So that's my album cover just about done. I'm loving that it features all the three main colours that will be found inside, that it has a couple of pops of that hard to get way from at Christmas red and of course how it always looks a little different each time I look because of the movement.
Page preparation
Oh yes this is so important to a like-to-get-ahead person like me! So I started by making my numbers.
Oh yes this is so important to a like-to-get-ahead person like me! So I started by making my numbers.

All the outside and inner mats were die cut using the three colours I've chosen for this year.

The numbers were created digitally, printed and punched.

Bit of a production line going on here, one set of colours at a time.

Numbers
all prepped and time to move on to the pages. I cut thirty-one 6" x 6"
squares from patterned paper and popped them into the page protectors.
I'd like to say randomly, but couldn't quite do that, so they went in a
brown, green, turquoise order and the numbers were popped in as well.

Some
days got extra bits popped in too - just in case you know - so
terrified I may forget to use something if I leave it in my stash pile!

But
of course I couldn't leave it there and actually laid the foundations
for a few pages when I know life is going to get particularly hectic -
got a few family birthdays in December.

And I'm thinking my pages are going to be a very comfortable mix of digital bits, paper bits and stamping.
Day 1 & Title pages
After
all the preparations at last it's time to get going and share a page -
well a few pages actually as I've done a couple of title pages as well
as Day 1.

Mmm,
three title pages, gradually increasing in size. I started with this
gorgeous Christmas tree stamp because - well just because I love it -
and it was the perfect fit for my advent photo challenge to be adhered
on the back.

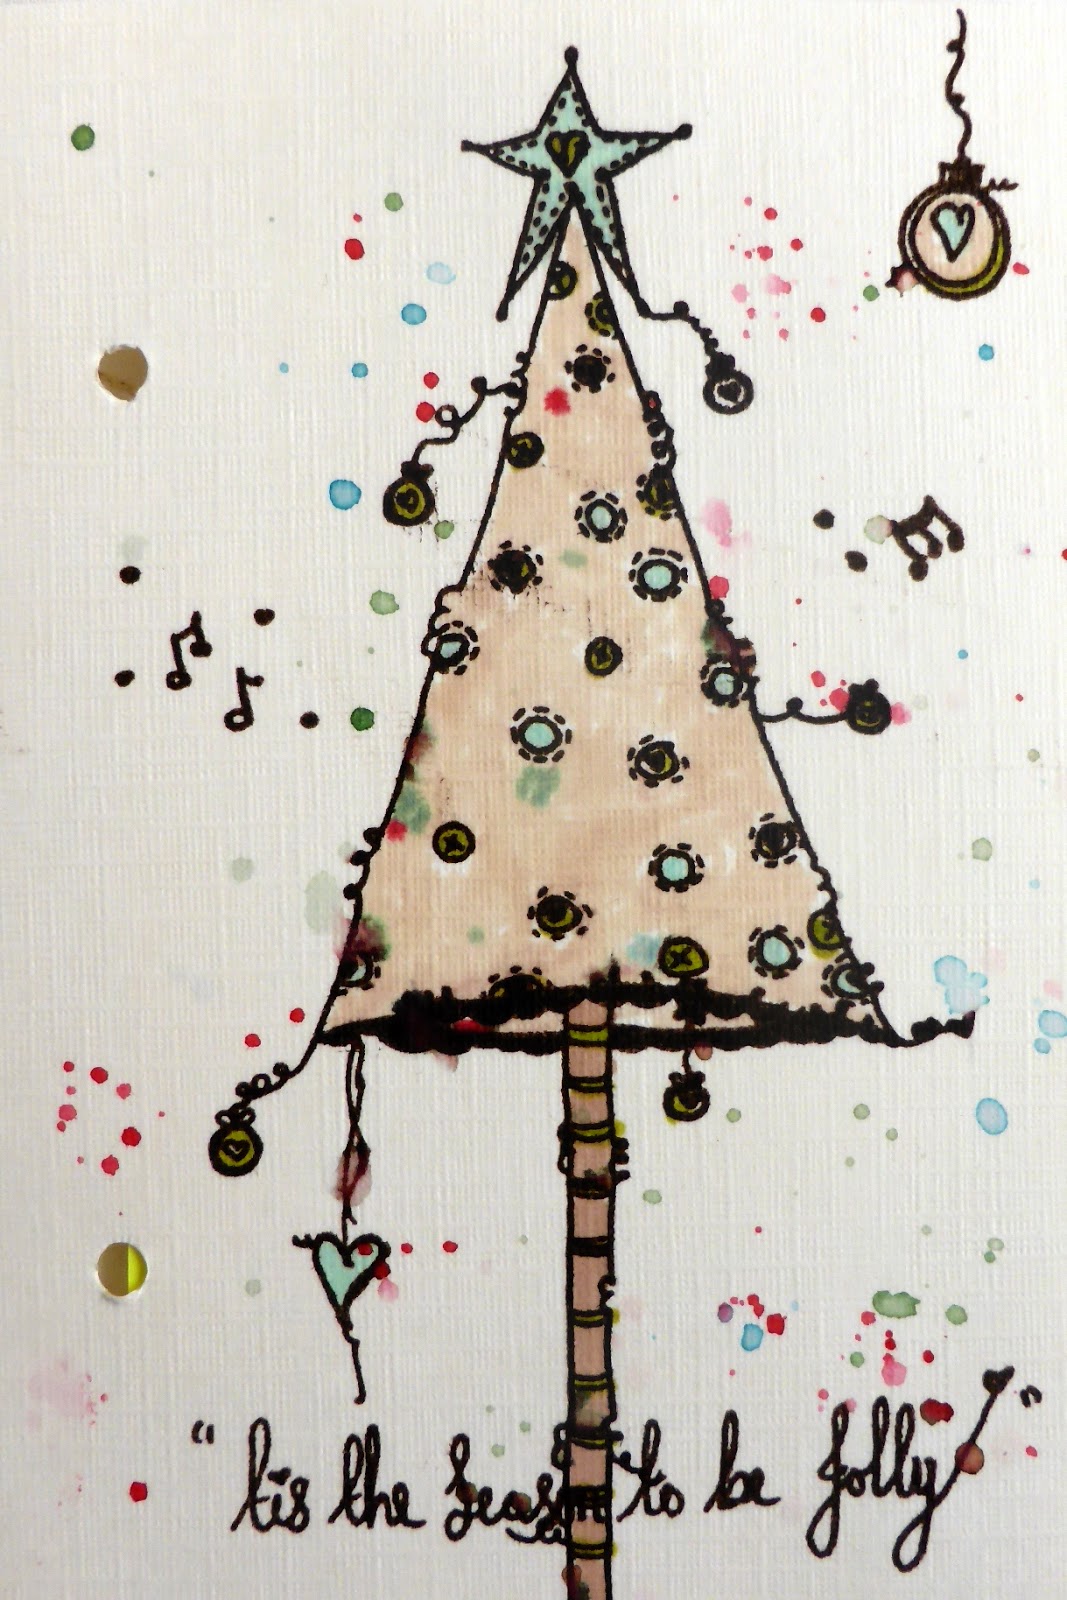
Next
up was a little poem that always make me feel Christmassy. When the
pages are closed the third page's 2016 shows down the right hand side
and the first page's tree allows the poem to be seen.

Here's the first two pages all opened up.

On
the back of the middle page I've adhered my 2016 weather chart. I
always include this in my DD album I suppose because it's fun to compare
temperatures from year to year, but mainly because it's become a bit of
a habit!

Here's my largest page

And
here's what's on the back of it - my December planner with a few things
already written in. Facing the large page is my 2016 manifesto or you
could say my intentions for the season.

A closer look at my intentions. This was created using photoshop elements and Katie Pertiet digital supplies available from Designer Digitals.

And
now on to my first proper page - yes it really is December 1st! So I
started by gathering all my supplies - a die cut deer and leaf border, a
stamp set, the number and a journal card.

I started by stamping the splatter, adhering the journal card and number to my backing paper.

The deer and leaf border were added next.

And finally some gems and my journalling.

Here's
today's photo. The border was created using photoshop elements and the
embellishments are Katie Pertiet digital supplies available from Designer Digitals.

I
added a trio of die cut stars to the empty space on my photo and I was
done. And it feels good to get the first page under my belt!

Day 2

I used my misti tool to place the stamps and get really deep and clear images.

I added some washi and a small PL card into the mix.

Once
the journalling was added I felt the page needed a bit of a colour lift
so I added three trios of enamel dots - this is a favourite thing for
me to do when making cards and scrapbook pages and will probably feature
again throughout my December album.

And here's the photo page all done digitally with photoshop elements and Katie Pertiet digi stamps.

Day 3

Time
to go buy that tree! The trio of trees were stamped and fussy cut and
decorated with sparkly gems. The truck embellishment is from Simple
Stories Mistletoe Kisses.

Journalling
added and a couple of more tree themed stickers - like how this makes
another trio of trees to balance out the stamped ones.

And here's that FOUND IT moment captured on camera! All the digi elements are Katie Pertiet and available from Designer Digitals.

Day 4

I began by placing the journal card and number and then stamping this gorgeous feathery tree and sentiment from Penny Black

I
coloured some microporous tape - you know the one from the first aid
box - to make my own washi strips and then put a little paper stack on
top.

I
added my journalling and then finished off the page with a washi and
ribbon strip down the left hand side, a die cut Stamplorations magical
word and a tree embellishment bought from Boyes - a cheapo UK shop. And
of course I couldn't resist some sparkly gems on the tree and a trio of
pearl round the sentiment.

Today's
photo is a bit bitter sweet, but daily scrapbooking can't always be
sunshine and light, sometimes it has to be what it is.

Day 5

Time
to get that tree decorated! I love this PL card - the subtle colours
and the quote - which was sent by a Pocket Letter friend last year so it
had to be included on a page and it seemed apt for today's photo. I
added the journal card, number and a tree themed stickerto get me
started.

And
then went to town once the journalling was added! Washi tape, two trios
of enamel dots, red gems on the tree and brown gems round the circle.
For a CAS at heart girl I sometimes get carried away once I let go!!

Today's
photo showing my conservatory as it's not looked for ages - mmm yes,
usually a play room and filled with toys. The photo and writing were
created in photoshop elements and the embellishments are from Katie
Pertiet.

Day 6

Today's page should have been all about a shopping trip and I prepared this page ahead as I knew I'd be late home and tired.

Well
things went a bit pear shaped for me today and I needed to add a longer
bit of journalling to explain, so out came the washi and a flap was
added to expand the journalling space. And that bobble string just
wasn't working for me either, so off it came and some more washi and a
rick rack braid replaced it. Some stickers and some trios of enamel dots
and then I was happy.

In
case you're wondering I did get to go on the shopping trip and here's
my favourite photo. Oh and I'm sharing the story under the flap on my
blog today - here.

Day 7

Back to some stamping as the focal point of today's page, here's how it all began:

Then
I went a bit crazy with the sparkly gems and added a wooden snowflake -
coloured with a promarker pen - to balance it all out a bit, ha!

Here's the completed page with journalling added.

Today's photo:

Day 8

Another page with stamping as the focal point. I love these Wonky Tonk trees, so whimsical.

Once
I added the journalling I decided the page needed a little something
more so I used a Stamplorations stencil to add a diagonal line of stars.
Then of course out came the sparkly gems!

Today's
photo features all my previous December albums which have come out of
hiding and are now on display by the real tree. The digi elements are
Katie Pertiet and available at Designer Digitals.

Day 9

Today
I knew the focus would be on my youngest grandson's birthday so I
prepared the page this far with a fun reindeer and a bright background
paper from MME Cozy Christmas.

Today
was bound to be photo heavy so I included one on my journal page and
then pretty much covered that background paper with stickers, a title
and sparkly gems.

I added a simple photo collage opposite and then needed to find a way to include more photos.

So
extra page protectors were inserted to enable this. And to add even
more sparkle - are you getting that I kind of love sparkle - I chose a
chevron semi transparency sheet added some sequins and stitched along
the zig zag, added some more sequins and stitched again and repeated
this process once more.

I
used my tiny purple sewing machine that I keep just for paper work,
saves me blunting the needle on my big fabric machine and it also tucks
under my craft desk easily.
Here's
the 'official' photo page for day 9 - you know, I mean the one that
follows the pattern I've established - see neat and tidy me has to
follow a pattern!

And this is the flip side of the chevron page.

Day 10

Today's page started with another of those gorgeous Wonky Tonk stamps - this time a penny farthing bicycle loaded with presents and few dangly accent stamps from the same set.

And then it got coloured and washi taped and arrowed!

And here's my tags! I'm sharing how I made them on my blog today - here. The digital elements are from the Katie Pertiet Antibes collection, Ali Edwards Cozy Christmas and ep Merry Little Christmas.

Day 11

I
took a quote card from Simple Stories Mistletoe Kisses and matted it
onto a PL card - love this quote, love the film too! The tree is also
from the Simple Stories collection.

I
stamped and die cut the bauble and tied a ribbon bow to it, added some
word strips and, of course, dazzled up the tree with gems and pearls.
Oops and spot that handwriting squidgy moment! All part of the daily
journalling process and I'm happy to embrace it as part of who I am.

I'm
loving the addition of some blue to the banner, makes it so much
brighter. The digital elements are from Katie Pertiet Antibes and Ali
Edwards Christmas Star & Cozy Christmas.

Day 12

Another
quote and a word from the Simple Stories Mistletoe Kisses collection
and a gorgeous shiny embossed background paper from Kaisercraft's Sea
Breeze pad got my page off to a great start..

A few little additions - a holly sprig, some washi tape and pearl gems and the journalling to complete this page.

I
used a journal card from Katie Pertiet's Antibes collection for the
stripy panel down the side of the photograph by rotating it round and
hiding the bits I didn't want to be seen under the photo. I often use
this trick in my paper crafting too, although I would be thrifty and
trim off the unused part for use on another occasion.

Day 13

The stamp I used as a starting point for today's page was a magazine freebie - always a good source of extra stash and I'm a bit mean really as I only buy magazines when I want the giveaways!

I
created the quote card using Photoshop Elements and then matted it onto
the woodgrain Bloom & Grow paper - the same as my cover - and
added a card snowflake from Mistletoe Kisses.

Apart
from one sticker and the inevitable sparkly gems I decided to leave
this page fairly unadorned - it is pretty full on with the stamping
anyway! And apologies about the photo colours being so different, they
were taken at different times of the day, but the ones below on the
finished page are the closest to real life.

Today's
photo includes more journalling as well as a very smug selfie - you
need to read it to find out why! The digital elaments are from Katie
Pertiet Antibes with the writing on the little button adapted to
something more relevant and Ali Edwards Cozy Christmas with the colour
of the text changed to brown. The font for the journalling is also Ali
Edwards.


Day 14

Please excuse the awful colours on some of my pics, really struggling
with the light, gloomy dark days here in the UK! Day 14 began with a
journal card matted onto pearlescent brown card - yes really it is brown
- a washi strip, a digi strip and the number.

Next I cut out three present shapes from left over pieces of patterned paper - Kaisercraft Sea Breezes - and popped narrow washi tape ribbons and a bow on top before making a wonky stack standing on the horizontal washi strip.

I cut the FA LA LA strip from a piece of Simple Stories Misteltoe Kisses paper to pop under the bow and then started my journalling. Seems I had more to say than would fit! So I made a flap, attached it with washi and popped a gingerbread man cut out on top. Oh and the obligatory sparkly gems of course!

I had a few photos that I wanted to include today so I made a strip of
circular shots, using photoshop elements, to go above the main photo.

Day 15

A very simple start to today's page - just a journalling card and the number.

I decided to make stamping a real feature and made a stamped PL style card and also two stamped and handcut trees using Uniko sets.

Once the journalling was written I added a couple of word stickers and an ampersand and made myself stop!

Today's photo features the contents of the gift bags and is very busy,
bright and hectic so I only added a shadowed border strip at the top and
bottom and a staple on the side and then called it a day.

Day 16

I started today's page with a stamped bird cage and a heart banner plus the journalling card and number .......

And then I went completely bonkers! Well the theme was crazy Christmas
jumpers! All the elements are from Simple Stories Mistletoe Kisses plus a
few alphas. What do you think about covering the love birds with the
cheeky Christmas bird? I decided it was more in keeping with the madness
of the page, those love birds were far too sophisticated!

As there was quite a chunk of empty space at the bottom of my photo I
added a little bit of extra journalling to fill it up. I also went a bit
crazy with the Katie Pertiet digi light strings.

Day 17

As I was still in mad mode from yesterday I stamped my favourite fun and fabulous reindeer and a silly sentiment to start off today's page.

I used alpha stickers to add three large words and the dots and some
word stickers went on the right of the journal card. Two hearts and a
star button - from a White Stuff label - and a phrase sticker fiished
off this page. And in case you haven't already spotted them the reindeer
have sparkly green gems on their noses.

My three precious grandsons all looking at the camera and all smiling!
Such joy - I can't tell you how many times this has not worked out so
well. The digi elements are Katie Pertiet Antibes and Ali Edwards Cozy
Christmas

Day 18

Another
wonderful woodgrain paper from Kaiserkraft Sea Breeezes was chosen as
the base for today's page. Three PL cards, a journal card and the number
was quickly added on top.

Then
I punched some leaves from pearlescent brown card and created a border
down the left hand sid I also added some red gems, brown pearls and two
strips of the hessian ribbon that I used as the washing line on my
cover.

Journalling added and the page was complete.

And here's the photo of almost the whole gang.

Day 19

A couple of journalling cards, some ribbon and a stamped Honey Doo Crafts Snowflake Reindeer plus the number was how I began.

Picking
up on the reindeer elements I added some wooden snowflakes to the
chopped in half card on the left hand side. And plenty of sparkly gems
and three word stickers went into the mix too.

Journalling added to complete the page.

Here's the digi photo page for today.

I decided to add extra photos about today and made a transparency shaker page to insert too.

I
die cut some stars and stitched most of the way round the large star,
inserted some sequins and then closed the star with more stitching. The
smaller stars are floating freely and add to the movement.

Here's how it looks inside my album.

Here's
a clear view of the photo. Have you spotted that pompom fringing that I
removed from a page earlier in my album? Waste nothing! And I'm loving
how it looks here!

Day 20

So today's page started oh so simply ....

And
then got a bit busier with the addition of a stamped bauble, greeting,
music notes, some grungy sprinkles and a star and brown pearls .......
.... expect
you've guessed - it finally got well and truly layered up. I used washi
tape, three almost funny jokes from inside yesterday's crackers - the
rest were so bad they didn't get saved - and some bright trios of
sparkly gems.

And look who came to sit on my Christmas tree - think I love the elf hunt as much as he does!

Day 21

Something
a bit different for today. I made a background out of ribbon and digi
strips and adhered the journal card and number to the middle. This was
inspired by Lizzy's page here.

I added the journalling round the edge, just like Lizzy's page. I tried it in black and then went over it in white to make it show up better.

And, a bit like Mandy, now the days are getting fuller my crafting is getting simpler. Not that these precious photos need a lot added, so I'm happy for them to speak for themselves.

As this was such a special day - all three grandchildren together all day - I decided to add a couple of extra photos. I cut a piece of patterned paper slightly larger than the 3x4 photos and attached the photos either side - back to back on to a chevron transparency.

It
took a bit of time to rumage through my stash to find sized matched
word stickers so that they looked OK on both sides of the transparency. I
also added some gems back to back too.

Day 22

Mm,
glued the journal card upside down and it won't come off. Glue is so
tricky like that, never holds what you want it to, but clings fast when
you've made a mistake!

Oh
well, best go with it then and cover up the more obvious upside down
bits. A gingerbread man and sweeties chipboard does the trick. Also
added a stamped and die cut bauble using a paperclip and a trio of brown
pearls.

A
few mishaps today in real life as well as crafting, but my photo page
is focussing on the positives. I added SPEND to cover an unwanted word
on the top banner (Katie Pertiet Antibes) and added a flair badge to the
end to complete the sentiment.

Day 23

I
knew I would have to include this wonderful Uniko wreath stamp
somewhere in my album and used it to outline today's number. I used my
misit tool to line things up and get a good clear stamping.
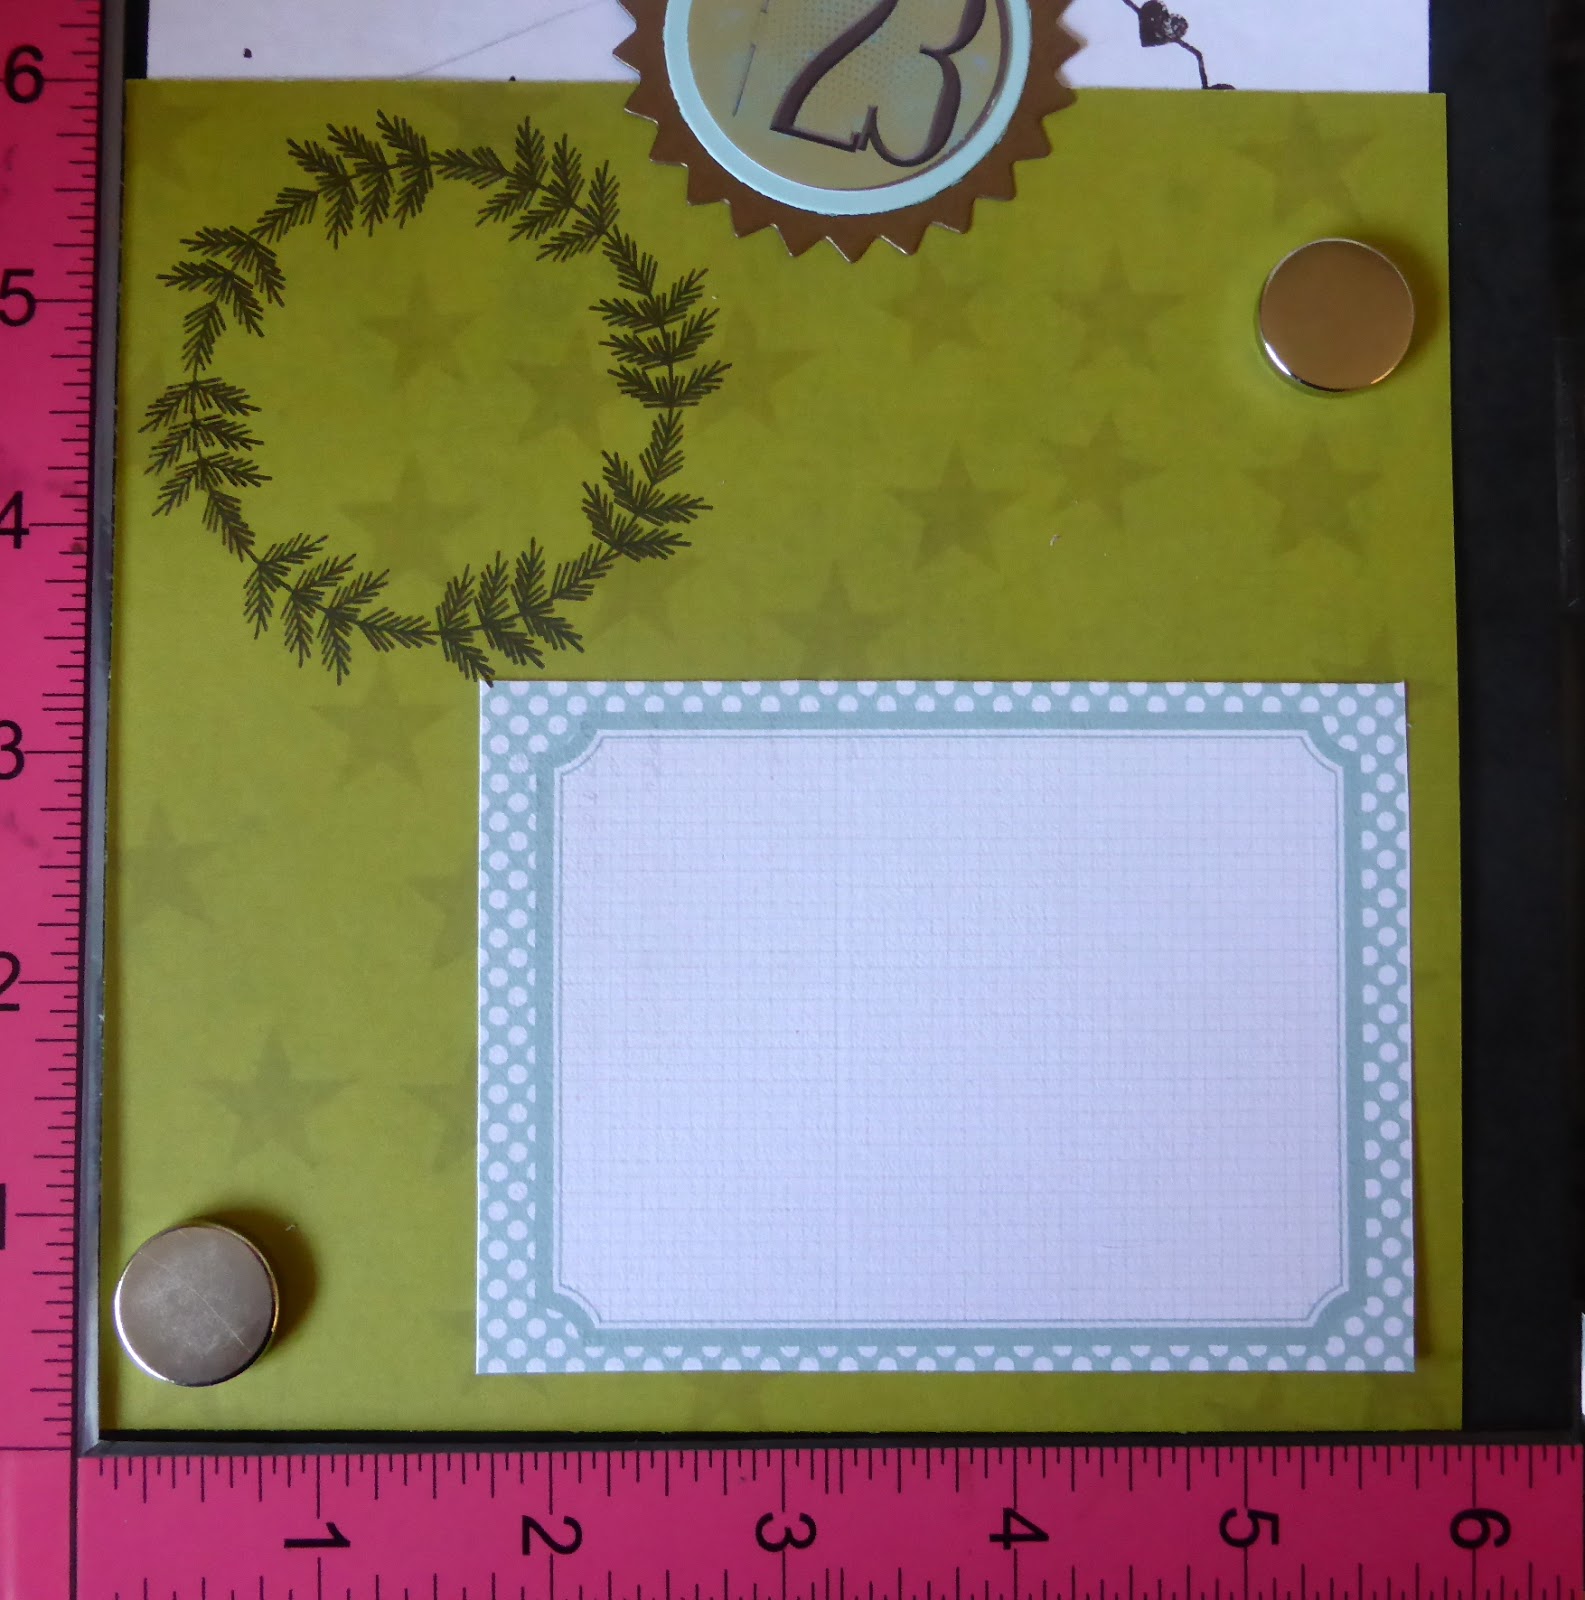
I added a small sprig onto the journal card too. A few stickers and a chipboard elf also found their way onto the page.

Some journalling and more stickers and I was done.

I
have several versions of this photo over the years and love how it's
always seems as if it's the first time for them. I think one of the most
wonderful aspects of a December Daily is tracking the similarities and
differences of each year, not to mention the growth of children! The
digi elements on today's photo are from ep Merry Little Christmas.

Day 24

Today's
focus was always going to be about that special Christmas Eve visitor
and I prepped the page accordingly with a stamped Clearly Besotted elf
reading the nice list and added stickers from Simple Stories Mistletoe
Kisses.

My
journalling about the morning used up all the space on the card, so I
decided I'd just have to add some more writing on my main photo page.

Inspired by Deb's inclusion of drawings by her grandchildren I decided to try out once more
this idea with my two older grandsons. In the past this has not gone well - boys!!! But today they were being very
co-operative and produced some real beauties for me.


I'd already prepared a square cut from a Hambly transparency with a
Wonky Tonk tree stamped with Staz-On timber brown ink. This seemed the
ideal opportunity to include it. So photos of the boys were mounted
onto patterned red card and then lined up back to back.

The word stickers were chosen carefully to match up too and then I took a leaf out of Lizzy's book and outlined them in pen.

And here's today's main photo page with that added journalling. The digi elements are all by Katie Pertiet and available from Designer Digitals.

Day 25 - the big one!

Here's how the page began ....

and developed ....

and finished up. No room for journalling ....

so I made another.

And developed it like this.

But no time for journalling now, so it stayed like this:

I decided to let the photos tell their own story.

There is also a page protector in between with some extra pics - sharing some of them on my blog - here.

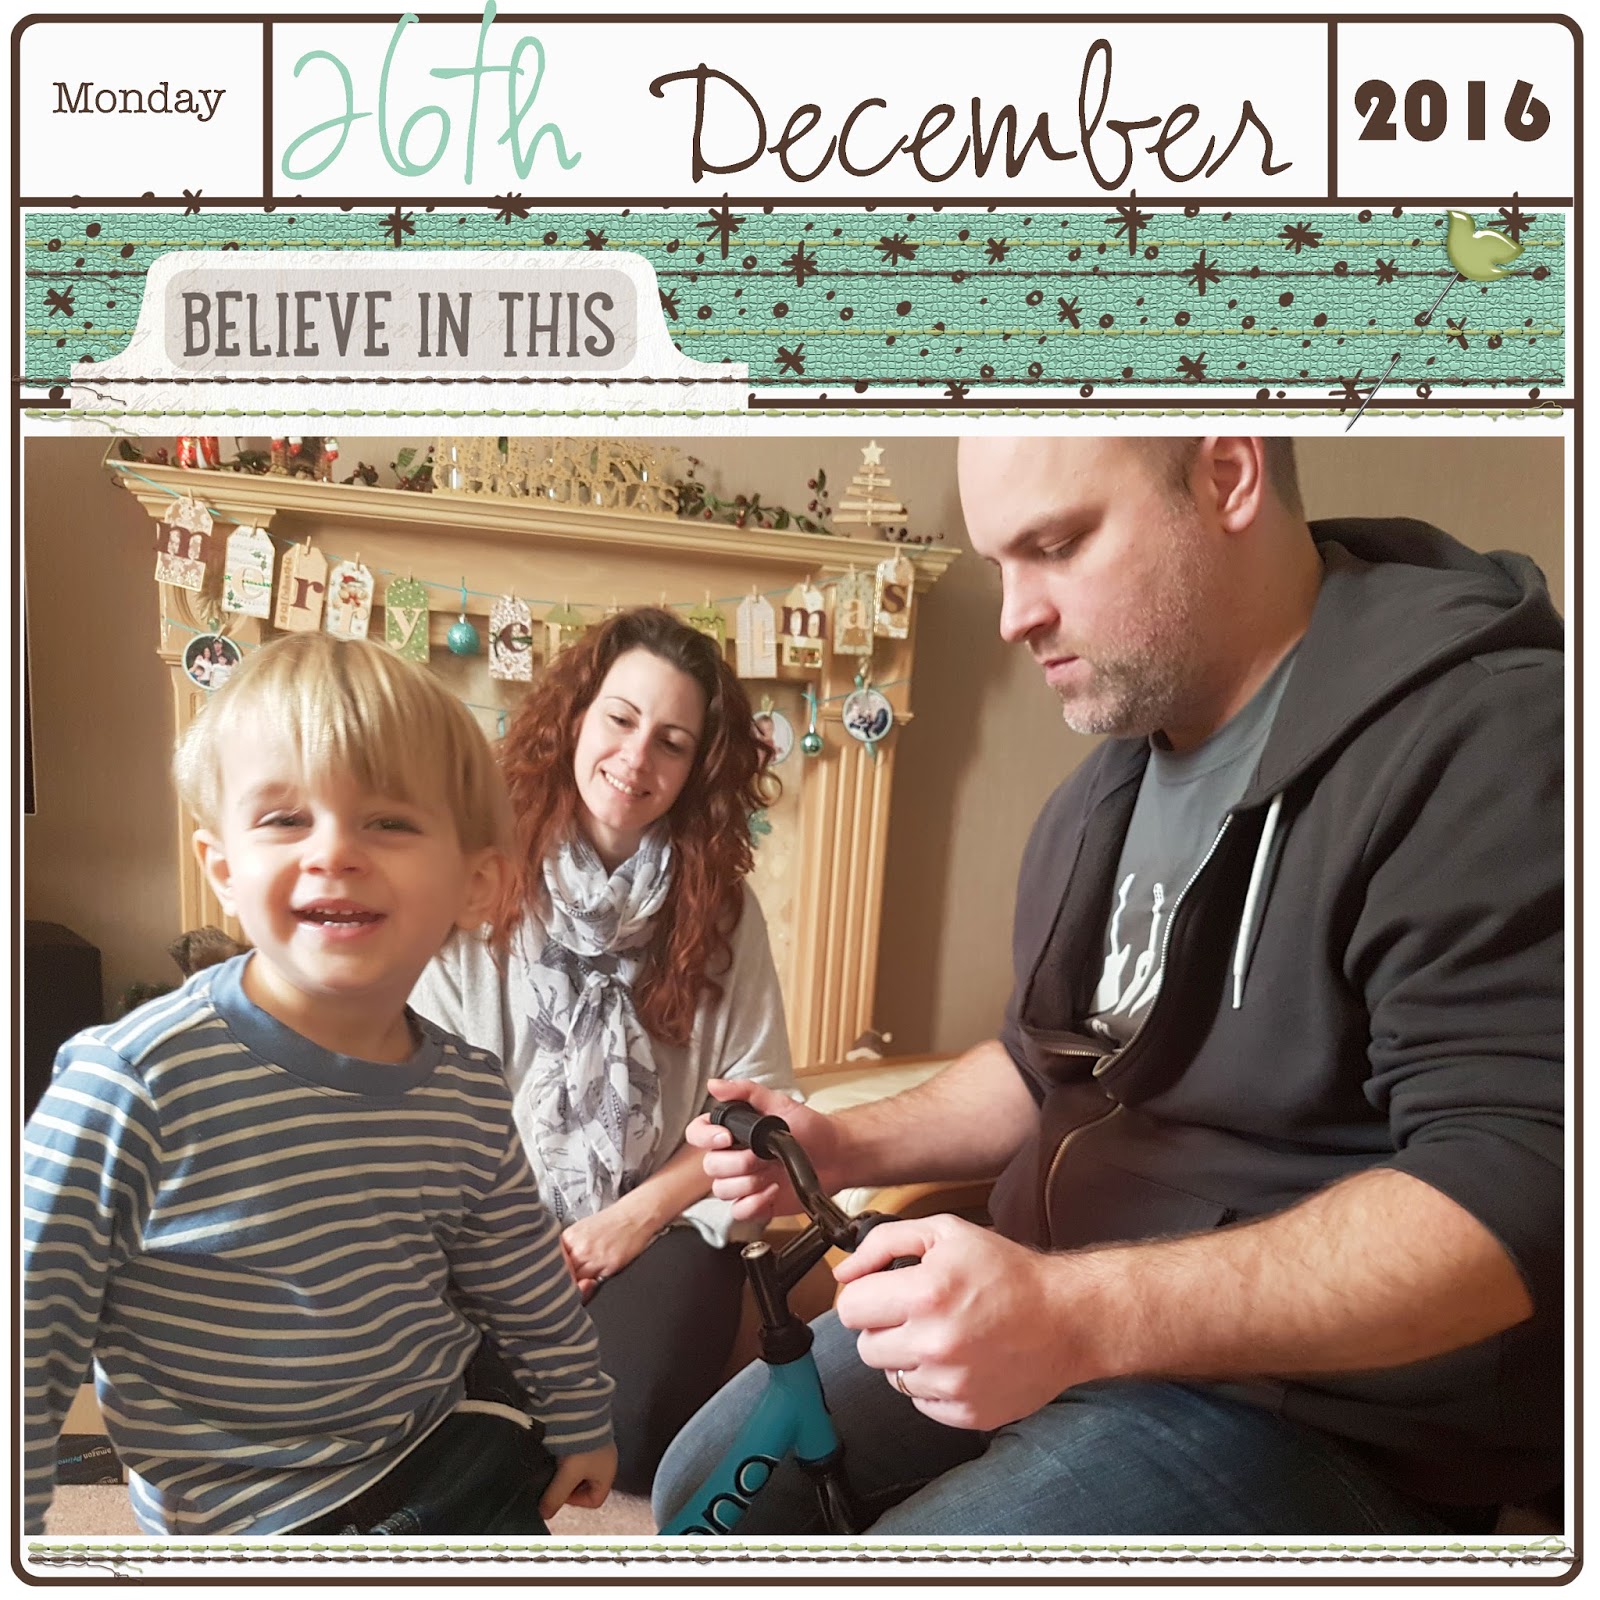
Day 26

Lots
of stamping on this page - a poinsettia from Uniko and trees and
sentiments from Clearly Besotted plus the journal card made using Katie
Pertiet Antibes digi elements.

I added some colour to the poinsettia and some vertical strips of washi to liven things up a bit.

A quick and simple digi photo page - maybe tomorrow things will calm down!
Day 27

At
last a quiet peaceful day without visitors and time to catch up a bit
on my album. I coloured some wooden snowflakes and die cut a leafy
strip.

I
added my journalling, some ribbon strips and a tree from Simple Stories
Mistletoe Kisses bits & pieces ephemera and thought I was done ...

....
but the pink dots on the tree were bothering me, so I covered them with
brown pearls and green gems. And discovered I was no where near
finished! Word stickers, picture stickers, red gems and a coating of
Wink of Stella to the snowflakes seemed like essential additions.

As this was a nothing much happening sort of day I decided to use all my Advent photo challenge pics in a digi collage.

Day 28

As I love it so much I used the reindeer die again - first appearance was on day 1.

I added some digi word strips, some ribbon and enamel dots.

Then
came the journalling and word stickers - chosen because it was such a
chillly frosty but bright and sparkly day. I noticed that the reindeer
was disappearing into the background a bit so I outlined it with a brown
promarker.

The
photo is up on Lincoln castle wall with the Victorian prison, ancient
keep and cathedral in the background just seconds before we began a
perilously slippery descent. The boys thought this enormous fun, but it
had me gripping the rail tightly with both hands!

Day 29

I'm
impressed that I'm still going and keeping up to date, but if I'm
honest the energy is beginning to flag and I'm so pleased I prepped so
much in advance. A simple beginning to today's page ....

... that got jazzed up with a die cut tree, digi word strips, a snowflake and sparkles.

And then some word stickers and more gems once the journalling was written.

One of my favourite photos from the season, so I just added an ep digi banner and kept it simple.

Day 30

Another prepared ahead starter page using that gorgeous woodgrain paper from Simple Stories Bloom & Grow collection.

As
this was a bit of a chill out, relaxing sort of day I chose a coffee
cup and a cupcake sticker placing them on top of my journal card. I'm
more than happy to cover over earlier bits like this if they just don't
seem to fit the page any more.

I
used alphas to make an appropriate sentiment and stamped the little
birds to create a border down the number card strip and linked it to the
journal card with one more bird.

I
used quite a few digi elements and brushes on my photo today, some
Katie Pertiet, some Ali Edwards and the smudge behind the title strip is
a freebie included in a Jessica Sprague workshop. And can I just say
here that just about everything I know about using Photoshop is as a
result of Jessica Sprague classes - can't recommend her highly enough!

Day 31

The
last day of my album today and also the last day of a bonus four extra
days with my Isle of Man grandsons - all due to their car break down.

Still keeping things very simple as I was wanting to the make the most of this last day with my grandsons. So I simply added a photo, a quote strip and some trios of enamel dots.
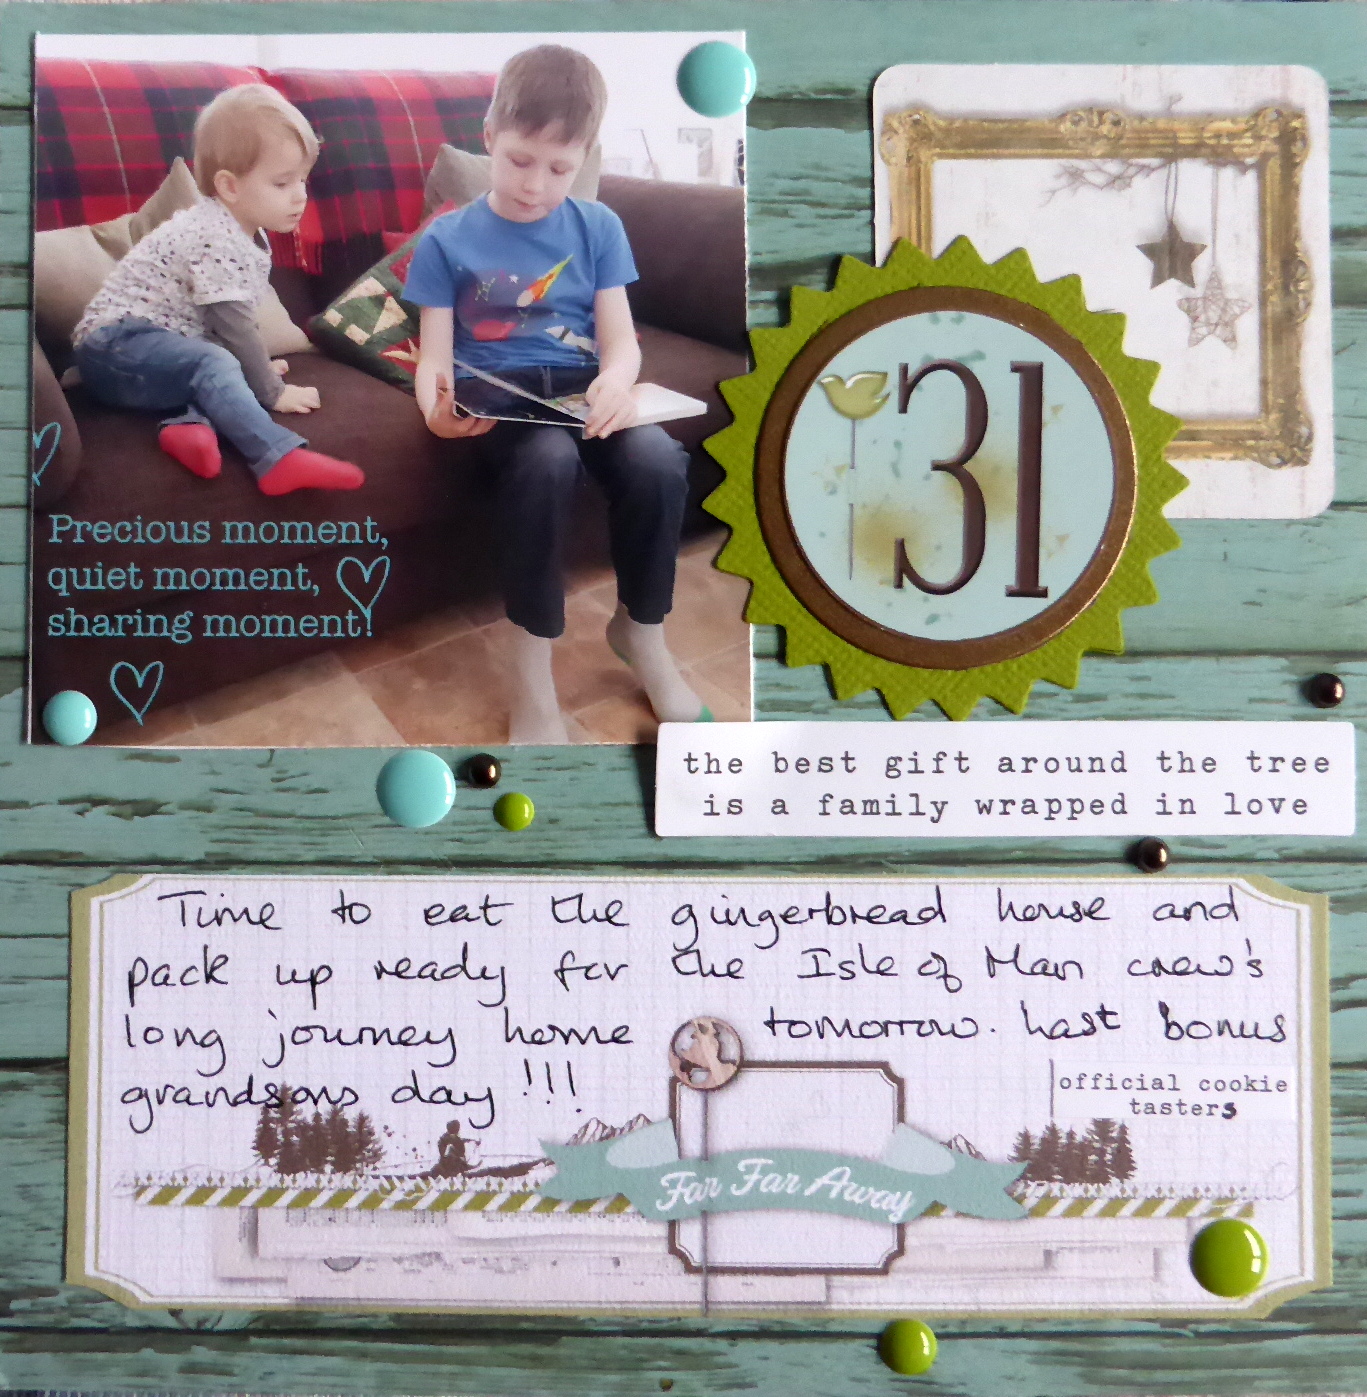
The digi elements today are from Katie Pertiet and ep and the photos reveal some very full mouths!

We'd love you to share all your process and December Daily journey with us
below:
We'd love to see them!

Love your cover, Jane. All of those hanging bits are just gorgeous - especially love the gems on the acetate.
ReplyDeleteThis is just gorgeous!! Love the little 'washing' line .. such a cute idea, and it looks wonderful!! Beautiful cover!!
ReplyDeleteTotally love the woodgrain!! An your little line is very creative with so many cute litle elements attached! Gorgeous work Jane!
ReplyDeleteWaaaay cute & fab idea with the clothes line:) I'm really loving the woodgrain pp too....be interested in what you come up with to 'protect' it from those little fingers!!!
ReplyDeleteCover looks great. The colours are so,different I'm looking forward to its development.
ReplyDeleteLoving the tree theme through the past few pages. Stunning work. Love ...love....
ReplyDeleteLOVE your album; so many fun elements! What really sticks out to me though is that weather chart; genius! Since I live in California, it would be fun to track the weather since it gets crazy out here! For example it was in the 90's on Thanksgiving this year! UGH!
ReplyDelete